Difference between revisions of "Pocket Expense reports"
| (4 intermediate revisions by the same user not shown) | |||
| Line 1: | Line 1: | ||
| + | <htmltag tagname="style">p a.image{border:1px rgb(0,0,0) solid;box-sizing:content-box;}</htmltag> |
||
| − | |||
<translate> |
<translate> |
||
| − | <!--T:1--> |
+ | == Marathon Pocket Expense reports == <!--T:1--> |
This guide describes how to handle expenses in your Marathon Pocket App. |
This guide describes how to handle expenses in your Marathon Pocket App. |
||
| + | |||
<!--T:2--> |
<!--T:2--> |
||
| − | Go to Expenses from the main menu. Select New Expense report. |
+ | Go to '''Expenses''' from the main menu. Select '''New Expense report'''. |
| − | |||
| − | <!--T:3--> |
||
| − | {{ExpandImage|MP-UTL-EN-Bild1.png}} |
||
<!--T:4--> |
<!--T:4--> |
||
| − | Write a headline for the expense. |
+ | Write a headline for the expense, for example "Travel costs". One expense report can contain several expenses. |
| − | |||
| − | <!--T:5--> |
||
| − | {{ExpandImage|MP-UTL-EN-Bild2.png}} |
||
<!--T:6--> |
<!--T:6--> |
||
| − | Tap New receipt |
+ | Tap '''New receipt''' and thereafter '''Add image''' |
| − | <!--T: |
+ | <!--T:8--> |
| + | Take a picture of the supporting document (receipt). If it looks OK, press the green key. If not, you can change colour and light with settings to the left of the green key. You can also import an image from your telephone by pressing '''Import''' instead of '''Add image'''. |
||
| − | {{ExpandImage|MP-UTL-EN-Bild3.png}} |
||
| − | <!--T: |
+ | <!--T:16--> |
| + | Select thereafter Type and the other requested information (amount, VAT, and if the purchase is connected to a certain project and purchase code, and possible quantity and text. If you are unsure about expense type, select "None" and write a more comprehensive text instead. |
||
| − | Add image of supporting document (receipt).Then write amount, tax, and possible project and purchase code. |
||
| − | <!--T: |
+ | <!--T:17--> |
| + | After saving you can add more receipts. |
||
| − | {{ExpandImage|MP-UTL-EN-Bild4.png}} |
||
| − | <!--T: |
+ | <!--T:18--> |
| − | When all the receipts are registered,tap Submitted. |
+ | When all the receipts are registered, tap '''Submitted'''. Your report will thereafter be approved and then disbursed. |
| − | <!--T: |
+ | <!--T:19--> |
| + | On the start page for Expense reports you can see expenses not yet booked and disbursed under the tab '''Expenses''''. You can still edit these and add more receipts |
||
| − | {{ExpandImage|MP-UTL-EN-Bild5.png}} |
||
| − | |||
| − | This view shows your own expense reports. |
||
| − | <!--T: |
+ | <!--T:20--> |
| + | Open the tab '''Booked''' to see previous expense reports and their disbursement dates. If your company disburses expenses via the payroll system, you cannot see the disbursement date here. |
||
| − | {{ExpandImage|MP-UTL-EN-Bild6.png}} |
||
| − | <!--T:13--> |
||
| − | The tab ”Booked" shows expense reports that have been booked and paid. |
||
<!--T:14--> |
<!--T:14--> |
||
Latest revision as of 13:09, 3 June 2020
Marathon Pocket Expense reports
This guide describes how to handle expenses in your Marathon Pocket App.
Go to Expenses from the main menu. Select New Expense report.
Write a headline for the expense, for example "Travel costs". One expense report can contain several expenses.
Tap New receipt and thereafter Add image
Take a picture of the supporting document (receipt). If it looks OK, press the green key. If not, you can change colour and light with settings to the left of the green key. You can also import an image from your telephone by pressing Import instead of Add image.
Select thereafter Type and the other requested information (amount, VAT, and if the purchase is connected to a certain project and purchase code, and possible quantity and text. If you are unsure about expense type, select "None" and write a more comprehensive text instead.
After saving you can add more receipts.
When all the receipts are registered, tap Submitted. Your report will thereafter be approved and then disbursed.
On the start page for Expense reports you can see expenses not yet booked and disbursed under the tab Expenses'. You can still edit these and add more receipts
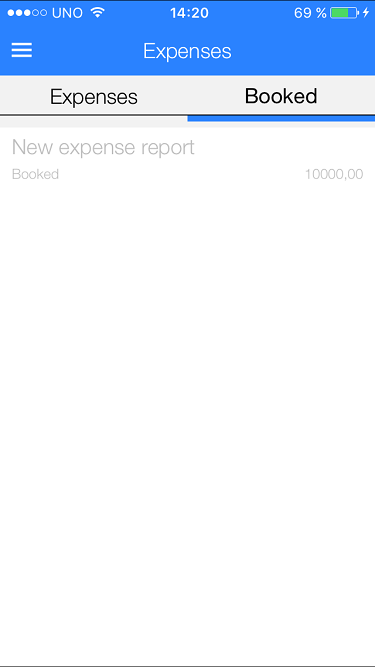
Open the tab Booked to see previous expense reports and their disbursement dates. If your company disburses expenses via the payroll system, you cannot see the disbursement date here.
