Difference between revisions of "Enter and approval of supplier invoices/da"
(Created page with "== Skab konteringsskabelon == Du kan sakbe en konteringsskabelon i {{pth|Basisregister/KRE/Konteringsskabeloner}}. Klik på {{btn|Ny}} og angiv et navn for skabelonen. Angiv k...") |
(Created page with "== Automatisk kontering == Du kan registrere en skabelon for automatisk kontering i en bilagsskabelon i {{pth|Basisregister/BOG/Bilagsskabeloner}}. Skabelonen gør en automati...") |
||
| Line 44: | Line 44: | ||
| − | == |
+ | == Automatisk kontering == |
| + | Du kan registrere en skabelon for automatisk kontering i en bilagsskabelon i {{pth|Basisregister/BOG/Bilagsskabeloner}}. Skabelonen gør en automatisk kontering da du bogfør på en basiskonto, fx 7410. Konteringen vises ikke på skjærmen da du registrere fakturaen men du kan se den i bogføringen. |
||
| − | You can register a template for automatic posting in a voucher template in {{pth|Base registers/GL/Voucher templates}}. A template makes an automatic posting when you book on a base account, e.g. 7410. However, the posting is not shown on the screen while entering the invoice, but you can see it in the bookkeeping. |
||
== Approval == |
== Approval == |
||
Revision as of 16:10, 27 August 2020
Contents
Registrering og godkendelse af leverandørfakturaer
Denne manual viser hvordan man håndterer registrering af indkommende leverandørfakturaer og godkendelsesprceduren i Marathon
Generelt
Leverandørfakturaer registreres i Økonomi: Leverandørfakturaer, fane Ankomstregistrering, dersom I benytter godkendelsesfunktionen i Marathon. Programmet indeholder følgende faneblad:Tilbudsforespørgsel, Rekvisitioner, Ankomstregistrering, Opfølgning, Bogførte fakturaer, Fejl/påmindelser og Forespørgsel.
Ankomstregistrering - scanning
Begynd ved at scanne ind eller importere fakturadokumenterne i Økonomi: Leverandørfakturaer, fane Ankomstregistrering. Vælg Scanning. Dersom I bruger Kalin Setterbergs fakturatolkningstjeneste, bliver fakturaerne automatisk registrerede med leverandør, fakturanummer, faktura- og forfaldsdato og beløb. Hvid su scanner fakturaerne, læg dem i scannern og vælg Scan. Hvis scanneren ikke er koblet til Marathon kan du brugen en anden enhed for at scanne dem ind på din computer- eller hvis de allerede er i digital form, vælg Import. En dialogboks åbnes, fra hvilken du kan hente en pdf-fil med én eller flere fakturaer. Du kan også bruge træk og slip for at skulle få pdf:en ind i Marathon.
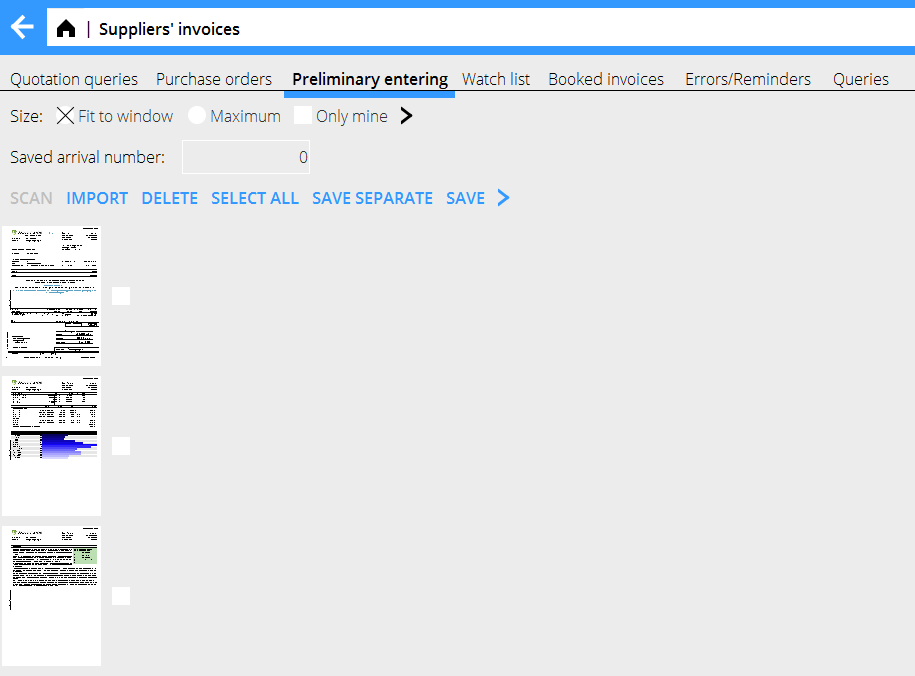
Efter importen vises siderne som miniaturer på skärmens venstre halvdel. Kontrollér kvaliteten på de scannede fakturaer og gem. Hvis fakturaen har flere sider, kontrollér én side ad gangen og vælg derefter Gem. Brug Gem separate hvis der findes flere fakturaer Skriv AT- nummer på originalfakturaen, fr afeltet Næste AT-nummer. Hvis du vil slete en scanned faktura, markér den og vælg Slet. Vælg alle markerer alle scannede deokument. Fortryd lægger igen alle scannede og gemte- men ikke registrerede fakturaer.
Ankomstregistering
Vælg Ny i ankomstregistreringen. Systemet foreslår automatisk næste ankomstnummer, men den er endringsbar. Ankomstnumret er det nummer, fakturaen fik ved scanning og kobles til det scanende dokument. Sammenlign originalfakturaen med den scannede i fanebladet Scannet dokument. Udfyld information om leverandør, fakturanummer, datum og fakturabeløb m/moms. (Mpmnsbeløbet kan udregnes med eller uden decimaler med en parameterindstilling i System: Basisrehister/KRE/Parametre, fanen Fakturaer – Vis decimaler) Vælg én eller flere godkendere og gem eller fortsæt til kontering.
Kontering
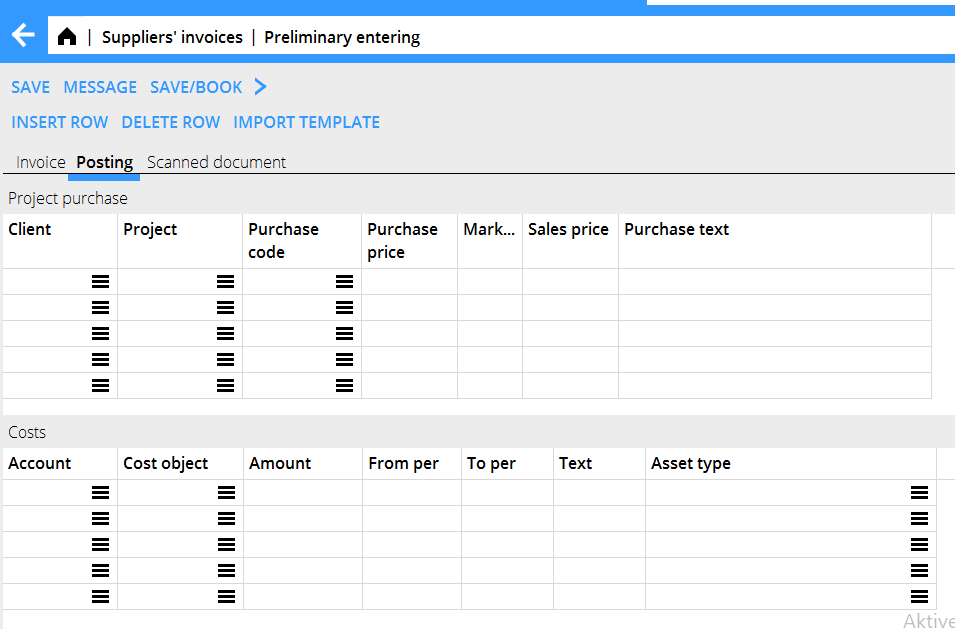
Fakturaen kan konteres allerede her, i fanebladet Kontering.
Brug den øvre tabel for at kontere jobindkøb. KOntoen for jobindkøb er allerede indstilt i parametrerne. Hvis du har brugt rekvisitioner, angiv rekvisitionsnummer for en automatisk udfyldelse af felterne(kunde, job, indkøbskode, indkøbspris). Ellers, udfyld felterne. Indkøbsprisen vil hentes fra fakturaregistreringen. Avancen for indkøbsprisen hentes fra indkøbskoden i Basisregister/Job/OmkostningskoderIndkøb (og i visse fall fra jobbet). Indkøbsprisen regnes automatisk ud. Systemet kan indstilles så, at den foreslagne avance ikke kan ændres. Indstillingen findes i Basisregister/JOB/Parametre, fanen Indkøb og Øvrigt, felt Ændr indkøbstillæg. I justeringsfanen findes der flere alternativer for håndtering af avance og salgspriser. Det hedder Afvigende indkøbsbrutto som justering. Da det er aktiveret, ændres forskellen mellem den foreslået pris og den nye salgspris til en justering. Brug den nedre tabel for at kontere omkostninger. Angiv kontonummer og mulig omkostningssted og -bærer, dersom kontoen tillader/kræver det i kontoplanen. Hvis omkostningen skal fordeles over en periode, angiv kun omkostningskonto og udfyld felterne for perioder. Balancekontoen for periodiseringer hentes fra parametrerne. Konteringerne for både job- og omkostningsfakturaer kan også laves i faktureringsvalutaen. Brug feltet Beløb fakturavaluta. Dette er til hjælp ved sortering av udenlandske fakturaer på de forskellige jobs og konti. Brug Importér skabelon hvis du vil importere en konteringsskabelon fra Basisregister/KRE/Konteringsskabeloner. Les mere i Skab konteringsskabelon. Hvornår alle scannede fakturaer er blevet ankomstregistrerede, skal de sendes til godkendere. Brug Send e-mail funktionen i Økonomi: Leverandørsfakturaer fanen Opfølgning. E-mailen vil sendes til alle godkendere på ikek godkendte fakturaer. Fakturaen mærkes med godkendere i Økonomi: Godkendelse
Skab konteringsskabelon
Du kan sakbe en konteringsskabelon i Basisregister/KRE/Konteringsskabeloner. Klik på Ny og angiv et navn for skabelonen. Angiv konto og mulig omkostningssted og -bærer, hvis kontoen tillader det. Beløb kan angives enten som procent eller et monetært beløb i jeres valuta. Hvis du vælger procent, får du et spørgsmål om beløbet i alt da du bruger skabelonen for at skulel regne ud det rette beløb.
Automatisk kontering
Du kan registrere en skabelon for automatisk kontering i en bilagsskabelon i Basisregister/BOG/Bilagsskabeloner. Skabelonen gør en automatisk kontering da du bogfør på en basiskonto, fx 7410. Konteringen vises ikke på skjærmen da du registrere fakturaen men du kan se den i bogføringen.
Approval
The approver can open the invoices in Accounting: Approval for approving and posting.
You can see the invoice document with the function Show invoice. If you are authorised, you can also approve an invoice without opening it with {{btn|Direct approval. Select:
| All | Shows all invoices, also those without approvers |
| Only not handled | Shows all unapproved invoices |
| Only own app. left | Shows only the invoices where you are the only remaining approver |
| Booked | Shows all booked invoices |
Select an invoice and click Open.
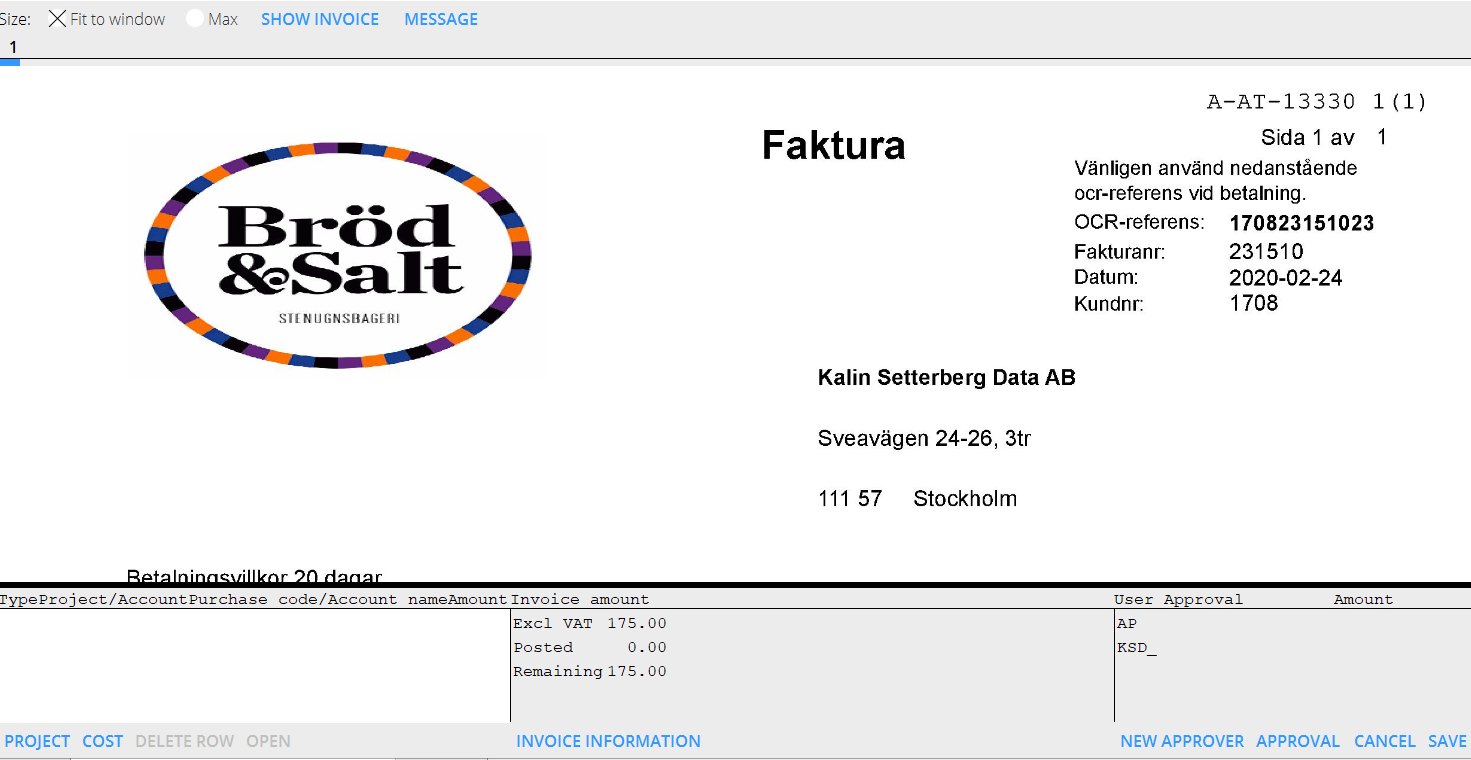
If the invoice already is posted it is shown as one or several posting rows in the field at the bottom left side of the page. Type Pro means project purchase and Type Cost a cost invoice. The field in the middle shows a summary of the invoice with invoice amount, how much that has been posted and how much posting remains. Click on Invoice information to see other invoice details. You can also scroll in the scanned invoice in the upper part of the screen. Click on Show invoice. The function Notes shows all notes that has been made concerning the invoice. You can also make new notes there. If the invoice already is posted it is shown as one or several posting rows in the field at the bottom left side of the page. Type Pro means project purchase and Type Cost a cost invoice. The field in the middle shows a summary of the invoice with invoice amount, how much that has been posted and how much posting remains. Click on Invoice information to see other invoice details. You can also scroll in the scanned invoice in the upper part of the screen. Click on Show invoice. The function Notes shows all notes that has been made concerning the invoice. You can also make new notes there. To post a project purchase, select Insert row Project. If you have been using purchase orders and state the PO-number, the remaining contents will be filled in automatically (client, project, purchase code and purchase price). Otherwise, fill in these fields, the purchase price will be fetched from the invoice registration. The mark-up for the purchase price comes from the purchase code in Base registers: Pro/Cost codes Purchases (and in some cases from the project). The sales price is automatically calculated. You can also use the invoice currency, which makes dividing a foreign invoice in several projects easier. The system can be set such that the suggested mark-up cannot be changed. The setting is in Base registers/PA/Parameters, tab Purchases and Other, field Change purchase mark-up. In the Adjustments tab there is more alternative in handling mark-ups and sales prices. It is called Special gross purchase as adjustment. When activated, it turns the difference between the suggested and the new sales price into an adjustment. Use the lower table for posting costs. Write the account number and possible cost centre and -object if the account allows/requires it in the chart of accounts. If the cost shall be allocated over a period (accrued), state cost account only and fill in the fields for periods. The balance sheet account for periodical allocations is fetched from the parameters. For pre-approval, final approval, partial approval or to state that the invoice shall not be paid, press Approval and select type of approval. You can also write comments regarding the approval. Click on Save approval. You can add approvers to the invoice with the function New approver. Save the whole invoice with Save.
Watch list
The watch list module is only used by the accounting department. The list shows all preliminary entered, but not booked invoices. List selections:
| All (1) | Shows all invoices regardless of approval status |
| Finished | Shows fully approved invoices |
| Not finished | Shows invoices with at least one remaining approver |
| All (2) | Shows all project- and cost invoices |
| Pro | Shows all project invoices |
| Cost | Shows all cost invoices |
| Rem. appr | You can select a specific approver's unapproved invoices |
| Reminder mail | Selected invoices will be sent as reminders to the approver |
| Book | Book one or several selected invoices that are fully posted and approved. Today's date is suggested as accounting date. |
| Show invoice | Shows the scanned invoice document |
| Scan | Possibility to add documents to the invoice |
| Invoice | Shows invoice information. You can also edit the information here |
| Posting | Shows posting. You can change posting here |
| Notes | Shows notes, possibility to add notes |
Move the mouse pointer over the Posting pro/cost field to see more detailed information. Move the pointer over the employee code to see how much that has been approved and possible comments. If a final approval or a posting is red and in parenthesis it indicates that the whole amount is not approved or that the approver has written a comment. After booking project related purchases they need to be updates ti the project accounting in Project: Registration, corrections and updates, tab Purchases. That can also be done automatically; the parameter is in System: Base registers/Pro/Parameters, tab Purchase and Other. Note that possible existing purchases must be updated manually at the time you check the parameter box.
Booked invoices
The tab shows the booked invoices. It shows also time and approver and what type of approval it was in the columns Final approval and Pre-approval. Select an invoice and click Open. The same invoice picture and invoice information as in the approval will be shown. It is also possible to read notes here.
Reverse erroneous invoice
You can reverse an erroneous invoice. Select invoice and press Reverse. There are two options:
- 1 Change approver. The suggestion is that the approvers are the same as on the selected invoice, but you can change them.
- 2 Also create a new debit invoice.
If you choose to create a new debit invoice, the reversal will result in two new invoices; one credit invoice of the selected invoice and a new debit invoice that is identical with the reversed invoice.
The invoices created by the reversal will be seen in the Watch list. All invoice details and postings are copied from the original invoice (but with opposite signs on the reversed invoice). The invoices are now ready for booking or correction or approval before booking.


