Difference between revisions of "Resource planning/da"
(Created page with "{|class=mandeflist !Fortryd |Angrer den seneste indtastning. |}") |
(Created page with "== Udvalg -vis ==") |
||
| Line 115: | Line 115: | ||
|} |
|} |
||
| − | == |
+ | == Udvalg -vis == |
{| class=mandeflist |
{| class=mandeflist |
||
Revision as of 11:25, 19 January 2016
Contents
Generelt
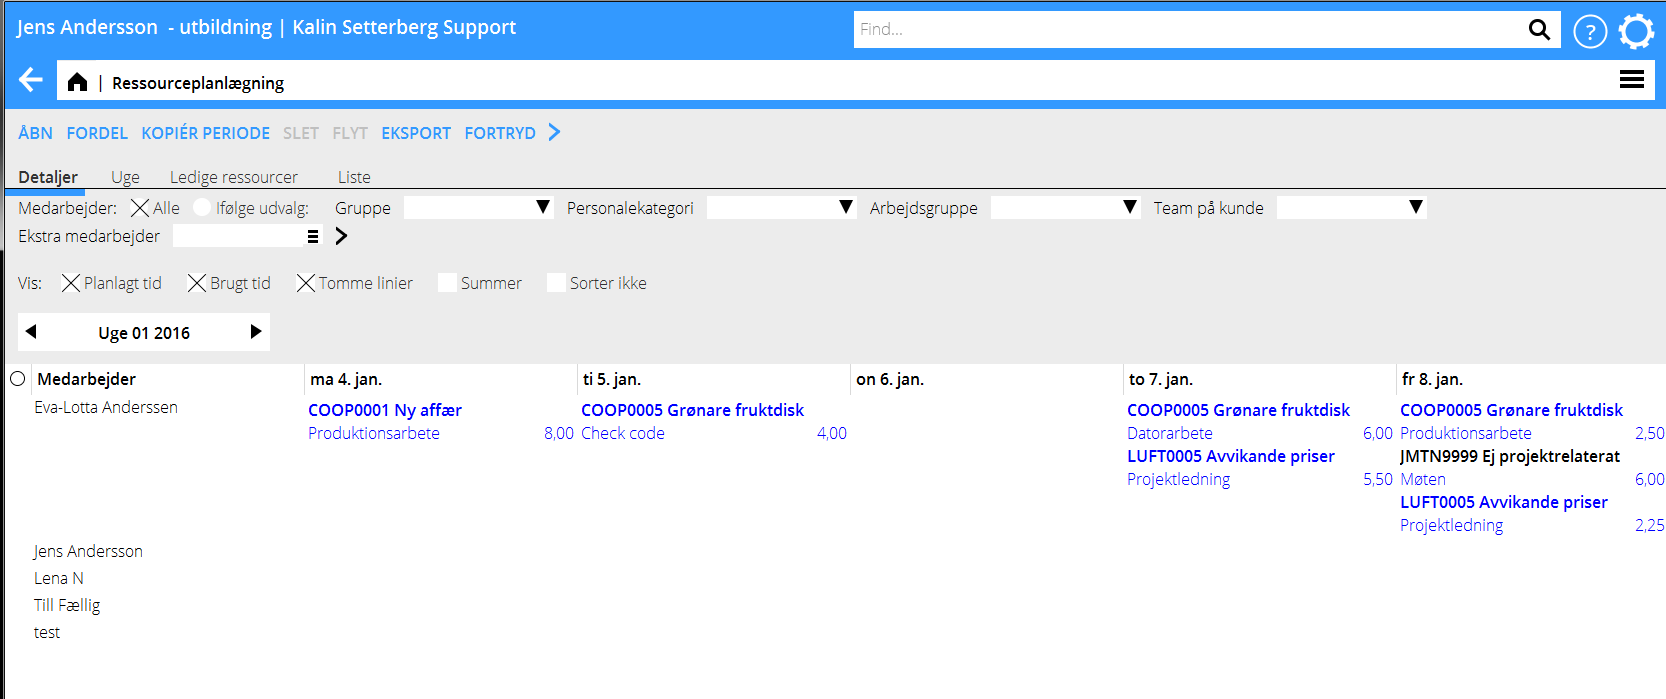
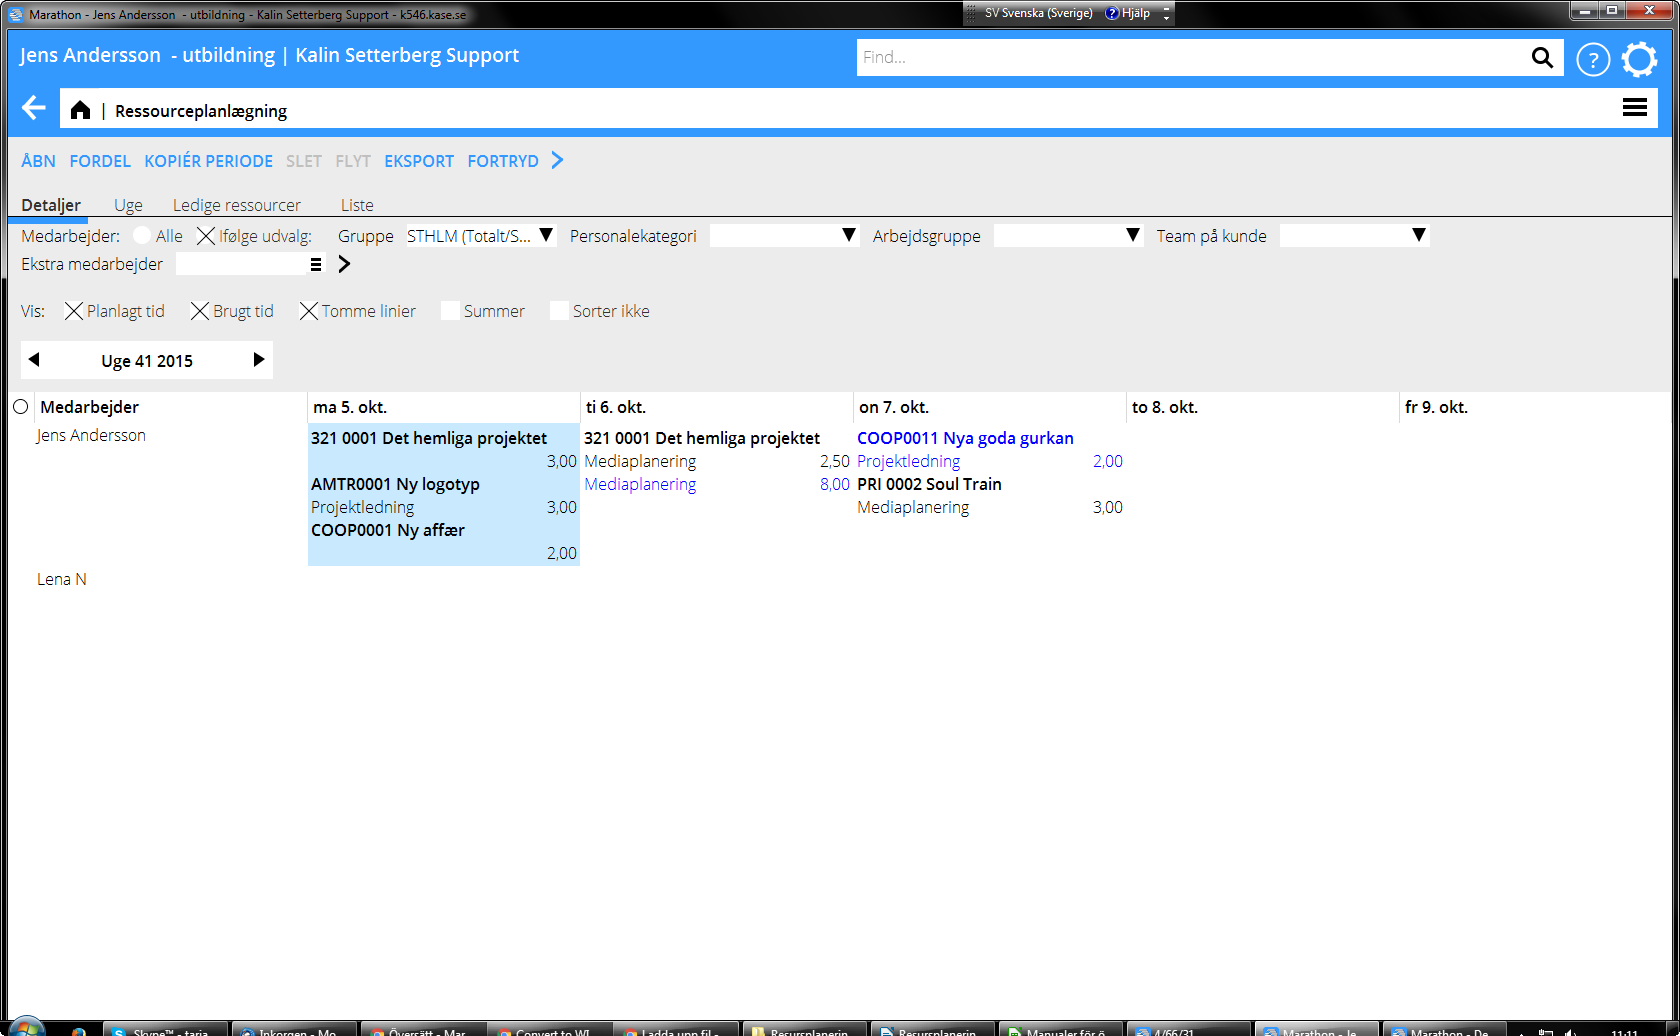
Ressourceplanlægningen finder du i Jobs: Ressourceplanlægning. I ressourceplanlægningen kan du planlægge medarbejdernes timer pr. dag og uge.
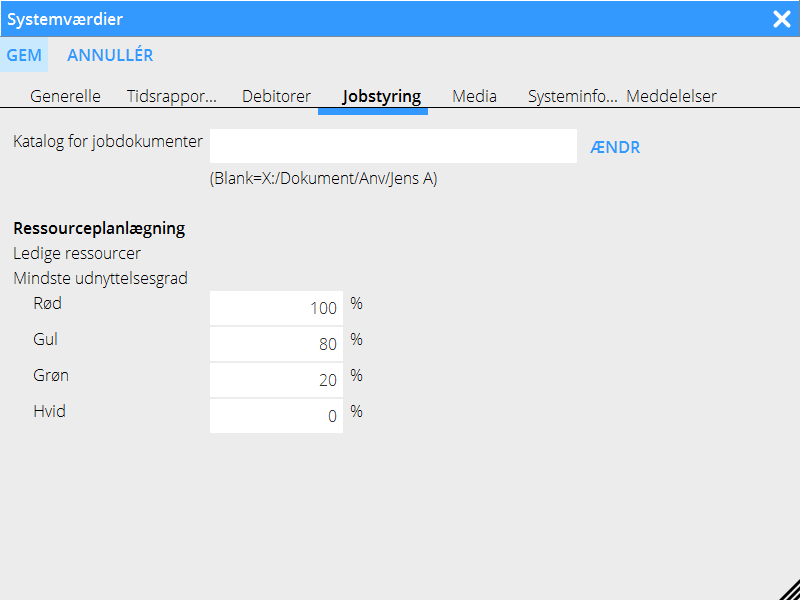
Farvemarkering for jobtype kan vælges under Tandhjulet/Systemværdier, fanen Jobstyring.
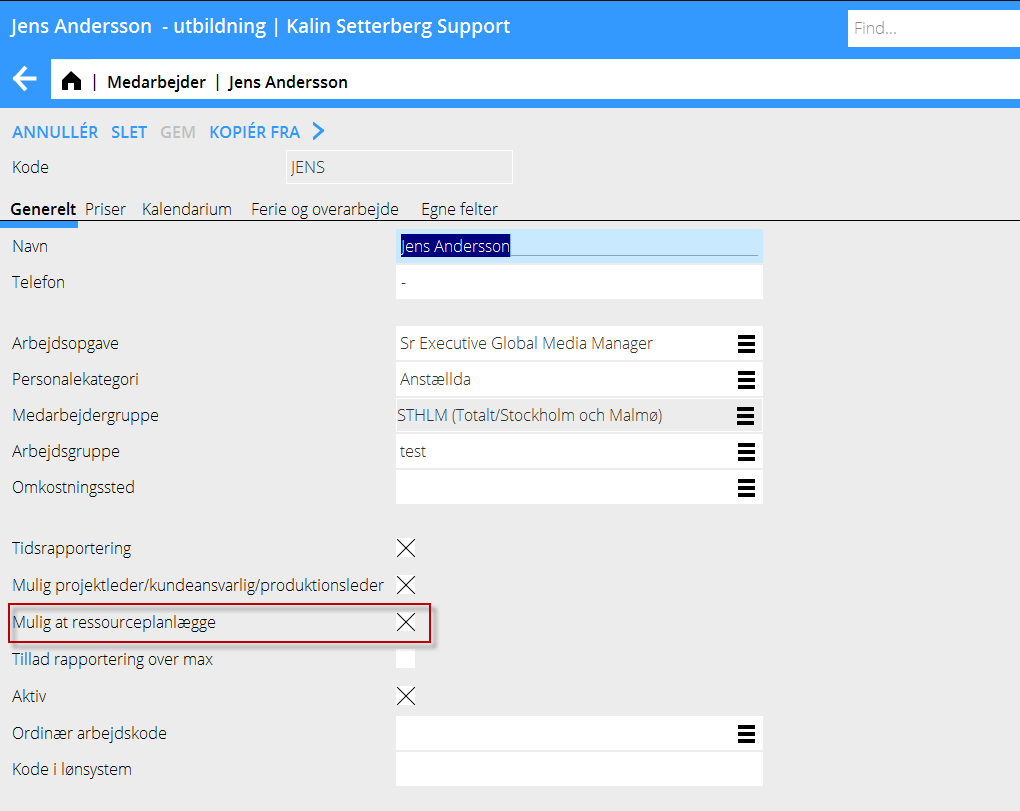
Medarbejdere, der skal være mulige at ressourceplanlægge, indstilles i System: Basisregister/Job/ Medarbejdere.
Du kan planlægge tiden for en gruppe, en personalekategori, eller et team. Du kan koble enkelte medarbejdere til gruppe, team og kategori i System: Basisregister/Job/Medarbejdere. Planlægning kan også foretages på team på kunde og ekstra medarbejder kan lægges til i udvalget.
| Group | Planning per group. Register group in System: Base registers/Pro/Groups and connect to employee in Base registers/Pro/Employees. |
| Staff category | Planning per staff category. Register in System: Base registers/Pro/Staff categories and connect to employee in Base registers/Pro/Employees. |
| Working team | Planning per working team. Register in System: Base registers/Pro/Working teams and connect to employee in Base registers/Pro/Employees |
| Client team | Planning per team. Team is stated on the client in System: Base registers/Pro/Clients/Projects – tab Team. |
| Additional employee | Possibility to add employees to the selection. |
| Favourites | If you only want the list to show your favourites, click on the far left column. Shift between favourites and all by clicking on the column header. |
Planlægning af ressourcer
Ressourcer kan planlægges pr. dag eller pr. uge. Dobbeltklik eller vælg en af medarbejderens dage og klik Åbn.
Hvis tiden skal planlægges pr. uge, lægges al tid på mandagen. Vælg detaljeringsniveau Uge for at se en oversigt.
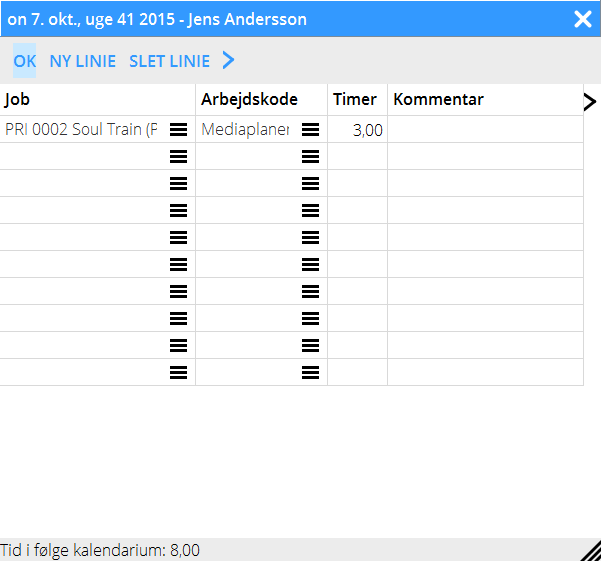
Indtast (eller hent) jobnummer, skriv en kommentar ind, indtast beregnet antal timer og jobkode. Du er ikke nødt til at udfylde alle felter før du kan gemme planlægningen. Klik på Gem.
Fordel ressourcer
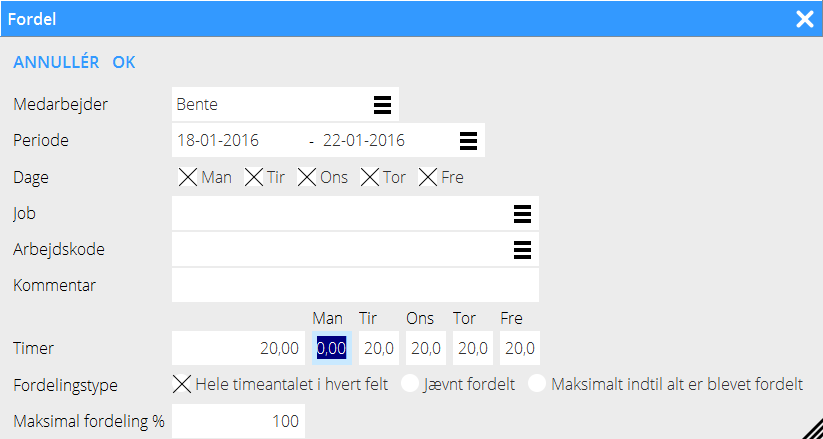
Vælg en eller flere medarbejdere og en eller flere dage og klik på fordel.
| Hele timeantalet… | Antal timer, du har skrevet ind i feltet Timer, vil komme på hver dag og hver medarbejder som du har valgt. |
|---|---|
| Jævnt fordelt | Timerne fordeles jævnt mellem angivne dage og medarbejdere |
| Maksimalt indtil… | Timerne fordeles i alfabetisk rækkefølge indtil alle timer er fordelte. |
| Maksimal fordeling % | Angiv procentandel af timerne for Jævnt fordelt og Maksimalt indtil alt er fordelt. |
Redigering af planlagte dage
Højreklik på en dag for at redigere planlagt tid (Ctrl + museklik på Mac). Det er mulig at markere flere dage for redigering på én gang.
| Kopier | En dag kan kopieres til anden dag eller anden medarbejder. |
|---|---|
| Flyt | Den markerede dag kan flyttes/klippes ud til en anden dag eller en anden medarbejder. |
| Sæt ind | Vælg dag, du vil kopiere til. Det erstatter tidligere information. Du får en forespørgsel om det før indsætning. |
| Læg til | En kopieret eller flyttet dag kan sættes ind i den markerede dag. |
| Slet | Al information i den markerede dag slettes. |
Övriga funktioner
| Piler | Bladre mellem uger med pilene |
|---|---|
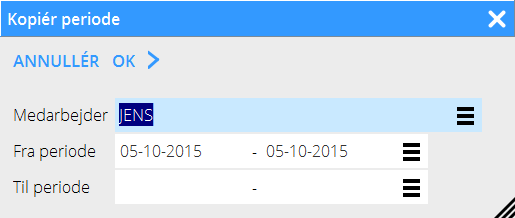
| Kopier periode | Med denne funktion kan du kopiere én eller flere medarbejdere og periode til en anden periode. |
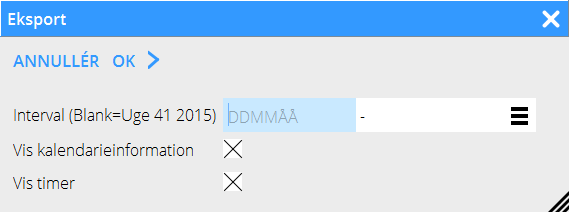
| Eksport | Klik Eksport hvis du vil skrive ressourceplanlægningen ud. Vælg derefter periode og OK. Du ser en selektion på skærmen. Under medarbejderen ser du den planlagte tid, og timer ifølge kalenderen. Hvis der finder flere planlagte timer end medarbejderens ordinære timer, vil summen vises med rødt. |
|---|
| Fortryd | Angrer den seneste indtastning. |
|---|
Udvalg -vis
| Planned time | If selected, the list shows the planned time from the resource planning. |
| Used time | If selected, the list shows the reported time from Time reporting. |
| Empty rows | If you want to see all rows, even those without planned time, tick Empty rows. |
| Sums | Summarises the day’s planned time. |
| Do not sort | Select/deselect for sorting in alphabetical order. |
Selection– Details
| Details | This selection shows a weekly resource planning per day and employee. |
| Week | Shows the planned time per week |
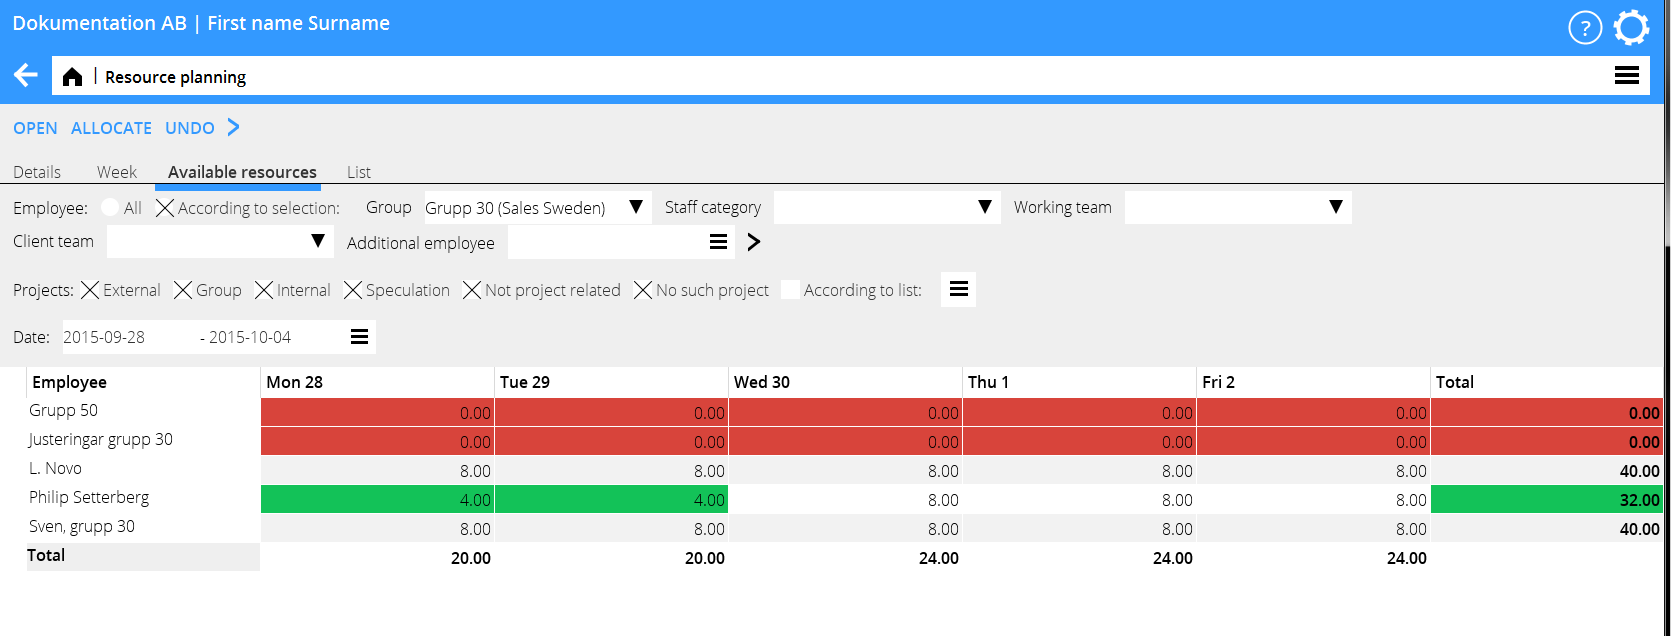
| Available resources | Colour settings can be made in FUNCTIONS the upper left corner; select SETTINGS and then Project accounting. Select rates of utilization for the different colours. In the example below, red colour indicates that the person is fully booked; green indicates that there is some time left and white that there is no planned time at all. If there is only a little time left for planning, the TOTAL- column will be yellow. |
List
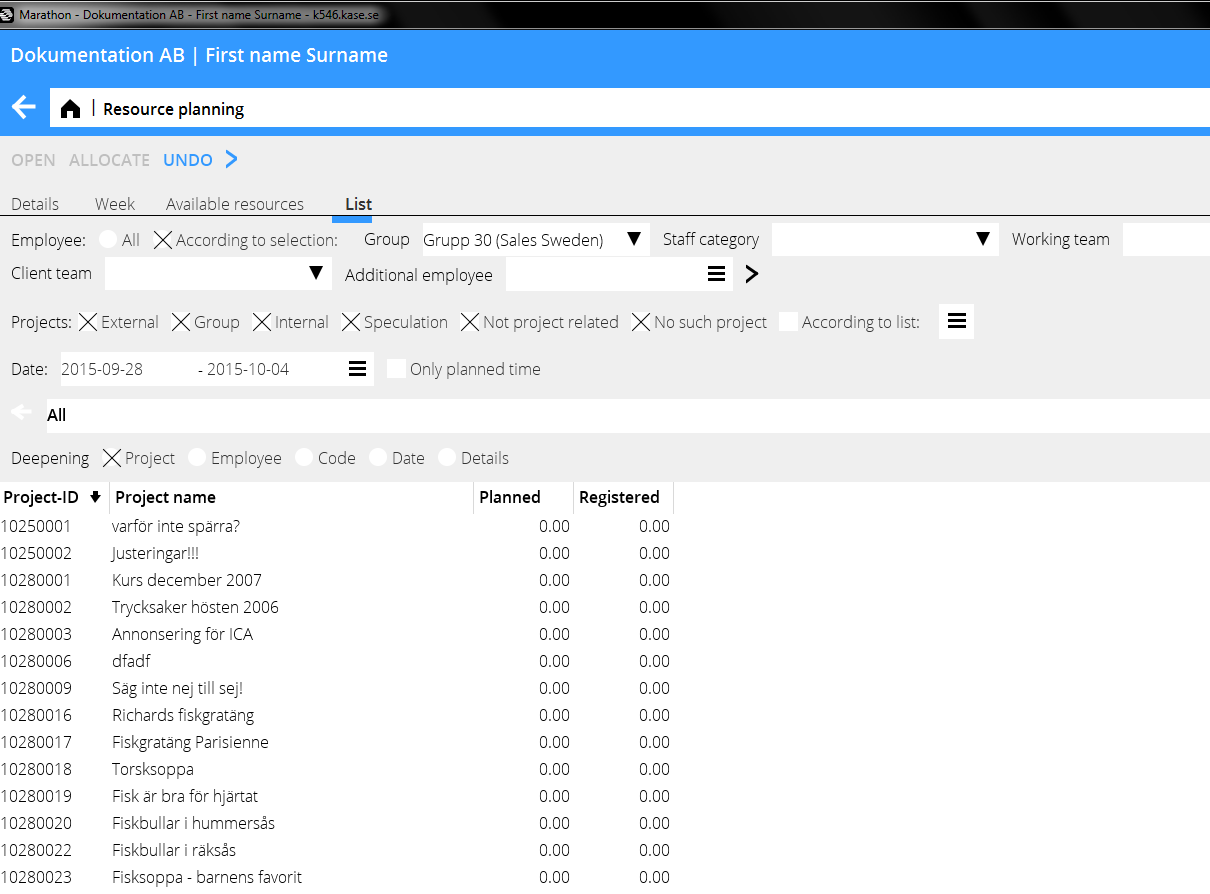
If you select List instead of overview, the program shows a list per project; what is planned and what has been registered. You can select type of project: You can deepen on date, employee, code, project or details. You can also deepen on a certain record, just click on a row to see details.
| Delete | On itemisation level “List”, deepening on “Details”, the Delete-button is activated. Select one or several rows (press Ctrl-key and select rows) and click on DELETE. |
| Project | Selection “All” shows all projects. “External” projects are E, G and J (external, group and speculations). “No spec” shows all except speculations. “According to list” opens a project list where you can select projects. |
Move
The function is used for moving hours on project – or employee level to other days. Select periods in the date fields (from –to). The period determines the first moving date and also limits amount of hours that can be moved.
Select deepening Project or Employee. Then, select project or person and click on Move. You will see a list of planned time for the project/person you’ve chosen.
State how many working days the hours will be moved ahead. You can also write a date in the field To (start date). The columns New date and Left after moving are updated after each moving.
New date shows the day of the planned move.
Left after moving shows the day after the move has been done.
Confirm by saving. Note, that a move cannot be undone.
Time reporting
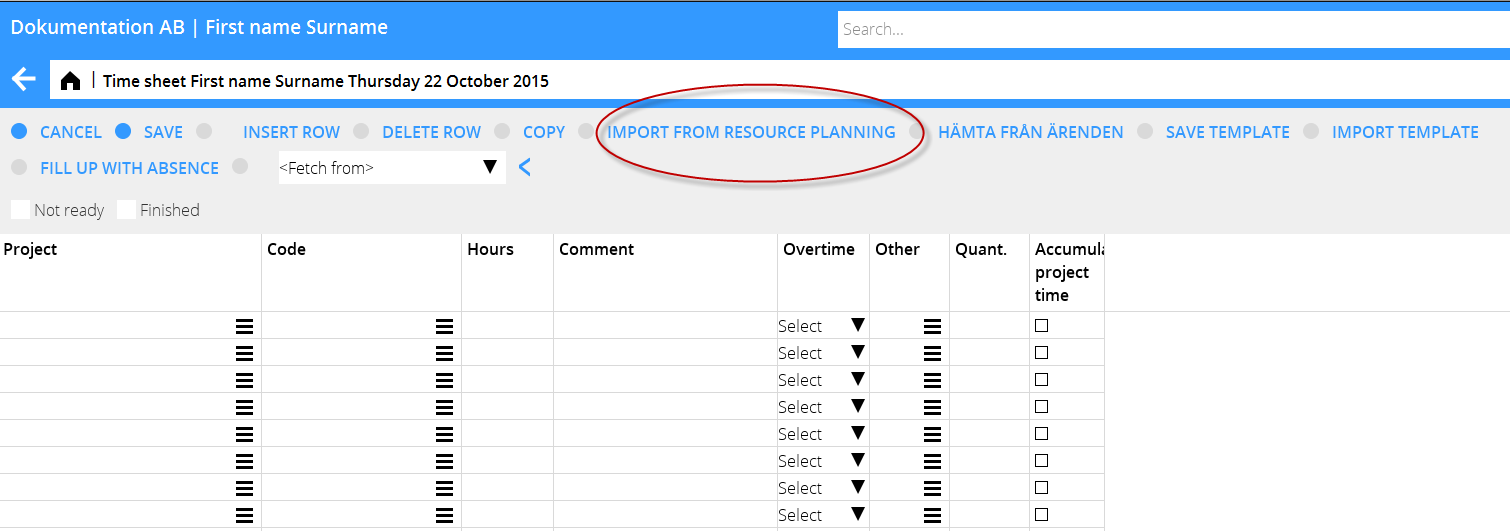
You can import project, comments and hours from the resource planning into the day report. Click the button IMPORT FROM RESOURCE PLANNING.
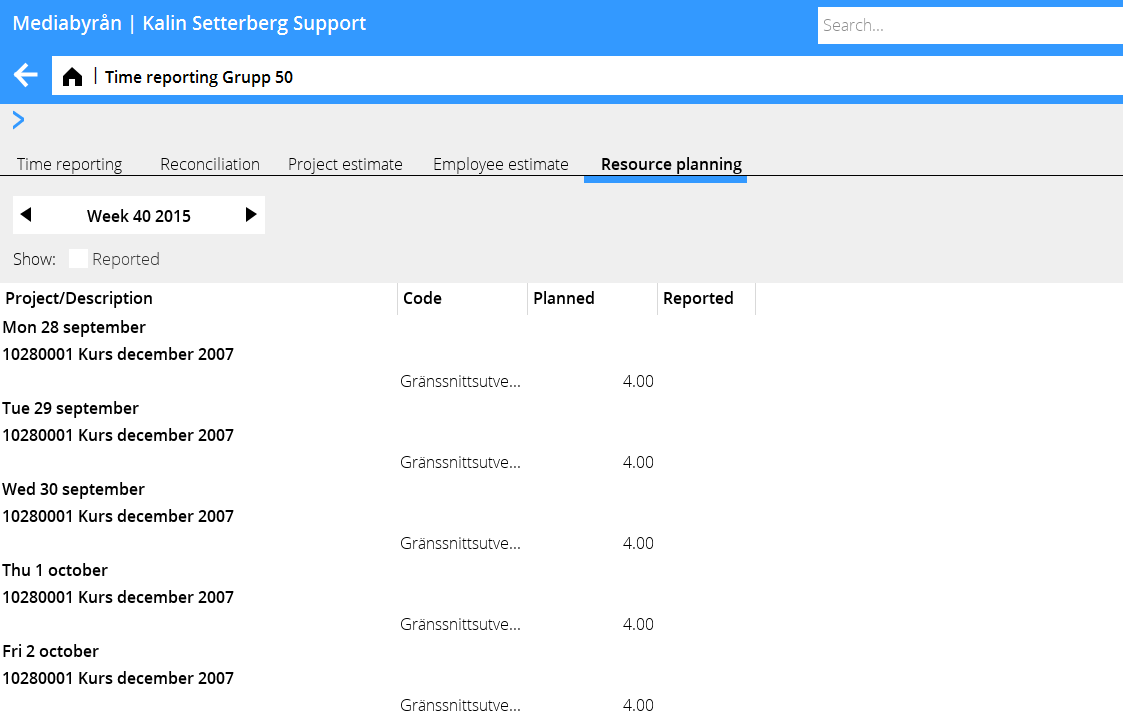
Click on RESOURCE PLANNING to see a weekly overview of your planned time. If you click the box REPORTED, you can compare your planned and used time.
Project: Queries
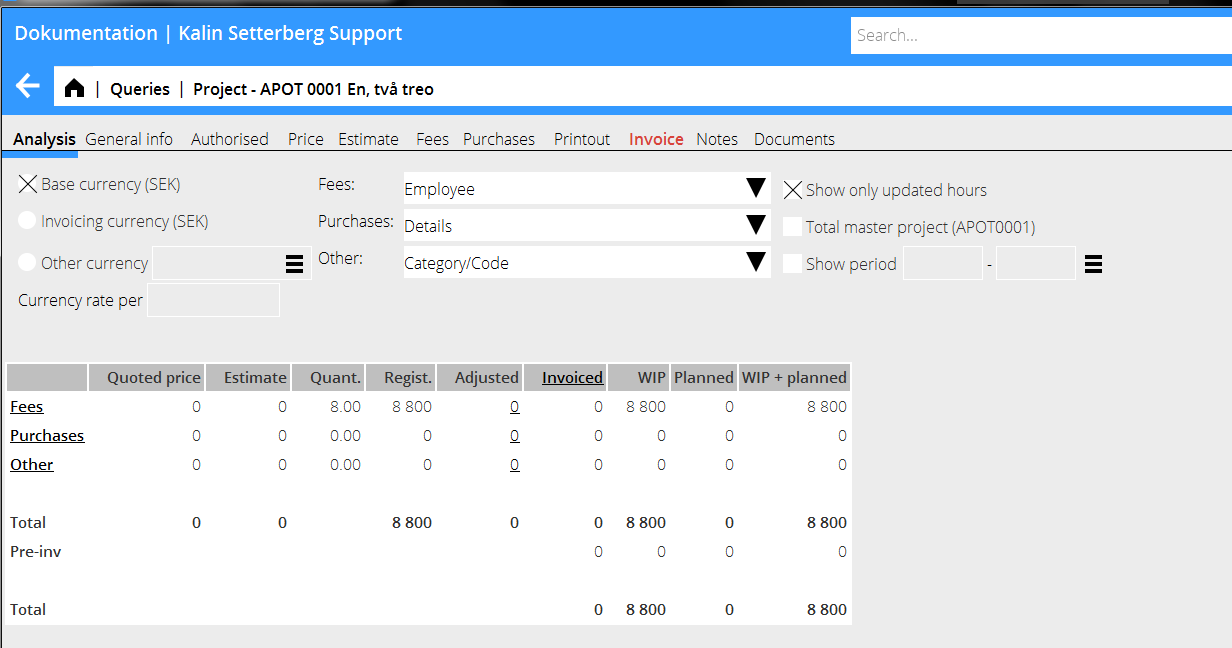
If the parameter ”Show resource planned in project analysis” is checked (in System: Base register/Pro/Parameters/Clients and projects), two columns are shown in the project analysis view: Planned 1 and WIP 2.
Planned shows sales price fees for all future time that has been planned on the project and WIP 2 shows WIP+ Planned.
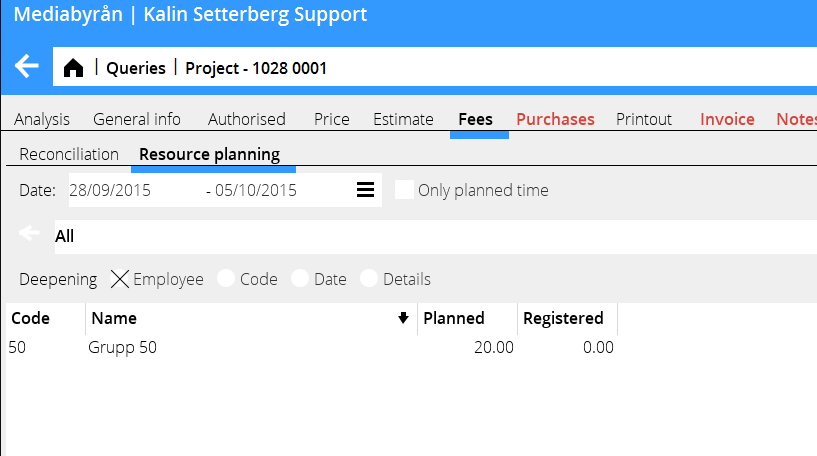
A project’s resource planning is shown in Project: Questions/Project, under the tab FEES. The list shows the planned time and the time so far reported on the project. You can select a time interval and sort the list per employee, code, date or details. You can also use quick search.
Reports
You can activate the data definition “Resource planned time” in Reports and use it as a column in your reports.
