Difference between revisions of "Enter and approval of supplier invoices/fi"
(Created page with "== Yleistä ==") |
(Created page with "Ostolaskut rekisteröidään ohjelmaan Taloushallinto: Ostolaskut (edellyttäen, että käytätte Marathonin hyväksyntätoimintoa). Ostolaskuissa on mm. välilehdet Saapumis...") |
||
| Line 3: | Line 3: | ||
== Yleistä == |
== Yleistä == |
||
| + | Ostolaskut rekisteröidään ohjelmaan Taloushallinto: Ostolaskut (edellyttäen, että käytätte Marathonin hyväksyntätoimintoa). |
||
| − | If you use the approval function of Marathon, suppliers' invoices (vendor invoices), the invoices shall be entered in Backoffice: Purchase Ledger. |
||
| + | Ostolaskuissa on mm. välilehdet Saapumisrekisteröinti ja Valvonta, Hyväksynnällä on oma ohjelma Taloushallinnon alla |
||
The subsystem consists of three modules: Preliminary entering, Approval and Watch list |
The subsystem consists of three modules: Preliminary entering, Approval and Watch list |
||
Revision as of 17:09, 4 January 2016
Contents
Yleistä
Ostolaskut rekisteröidään ohjelmaan Taloushallinto: Ostolaskut (edellyttäen, että käytätte Marathonin hyväksyntätoimintoa). Ostolaskuissa on mm. välilehdet Saapumisrekisteröinti ja Valvonta, Hyväksynnällä on oma ohjelma Taloushallinnon alla
The subsystem consists of three modules: Preliminary entering, Approval and Watch list
Preliminary entering -scanning
Start the registration process with scanning of the invoice documents in Backoffice: Purchase ledger/Preliminary entering. Select Scanning. Put some invoices in the Scanner, select Scan. If your scanner not is connected to Marathon, you can use another device for scanning and then use the Import function go fetch the documents into Marathon.
Check the quality of the scanned invoice by clicking on the miniature that is showing on the left side in the screen. Check the box and click Save. If the invoice has several pages, check one page at the time and then Save. Write the AT number on the original invoice (shown in Next AT number).
If you want to delete a scanned invoice, select it and click Delete. Select all checks all scanned documents. Undo puts back scanned and saved – but not registered invoices.
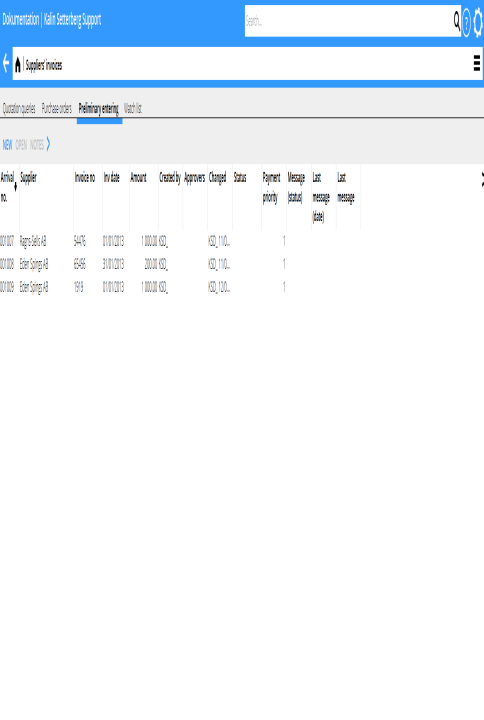
Preliminary entering
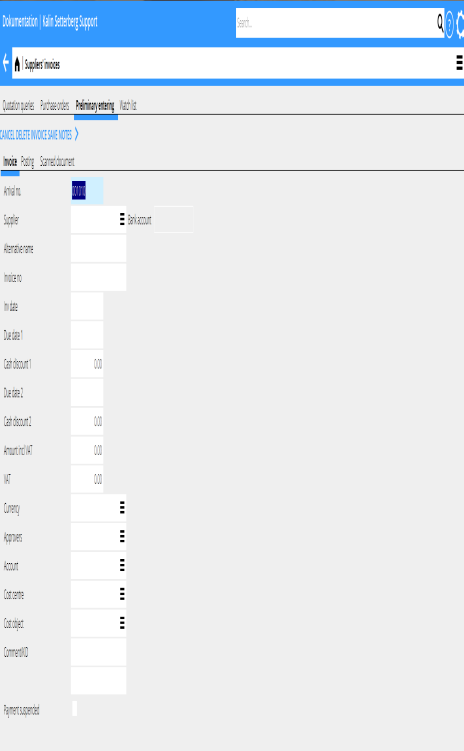
Select New in the preliminary entering. The system automatically suggests next arrival number, but you can overwrite it. The arrival number is the number that the invoice got at the scanning and is connected to the scanned document. Compare original invoice with the scanned one in the tab Scanned document. Fill in information about supplier, invoice number, date and invoice amount including VAT. (The VAT amount can be calculated with or without decimals with a parameter setting in Base registers/Lev/Parameters, tab Invoices – Show decimals) Select one or several approvers and save, or proceed to Posting.
Posting
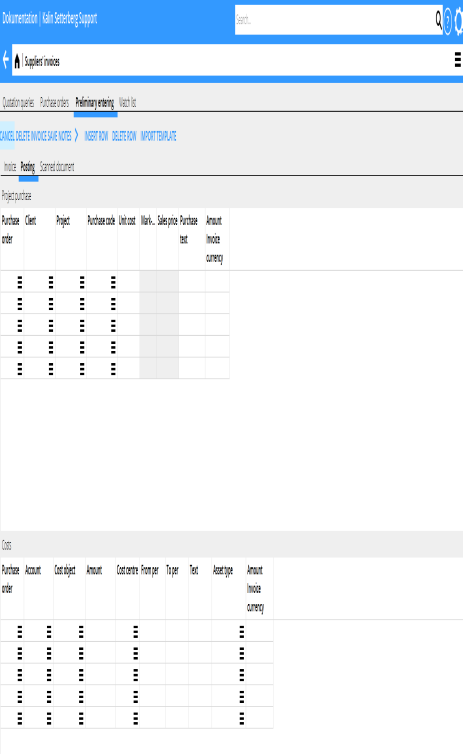
The invoice can already now be posted in the Posting tab.
Use the upper table for posting of project purchases. The account for project purchases is already set in the parameters. If you have been using purchase orders , enter PO number and the remaining contents will be automatically updated (client, project, purchase code, purchase price). Otherwise, fill in these fields, the purchase price will be fetched from the invoice registration. The mark-up for the purchase price comes from the purchase code in Base registers/Pro/Cost codes Purchases (and in some cases from the project). The sales price is automatically calculated.The system can be set such that the suggested mark-up not can be changed. The setting is in the Base registers/PA/parameters; tab Purchases and Other, field Change purchase mark-up. In the Adjustments tab there is more alternative in handling mark-ups and sales prices. It is called Special gross purchase as adjustment. When activated, it turns the difference between the suggested and the new sales price into an adjustment.
Use the lower table for posting costs. Write the account number and possible cost centre and -object if the account allows/requires it in the chart of accounts. If the cost shall be allocated over a period (accrued), state cost account only and fill in the fields for periods. The balance sheet account for periodical allocations is fetched from the parameters.
The posting for both project purchases and costs can also be made in the invoice currency. Use the field Amount invoice currency. This enables the sorting of foreign invoices on different projects or accounts.
Use Import template if you want to import a posting template from Base registers/PL/Posting templates. Read more in Create posting template.
When all scanned invoices are preliminary entered they shall be sent to the approvers. Use the Send e-mail function in Backoffice: Purchase ledger/Watch list. The mail will be sent out to all approvers
The email will be sent to all approvers on unapproved invoices. The invoice is marked with the approver in Frontoffice: Project/Approval.
Create posting template
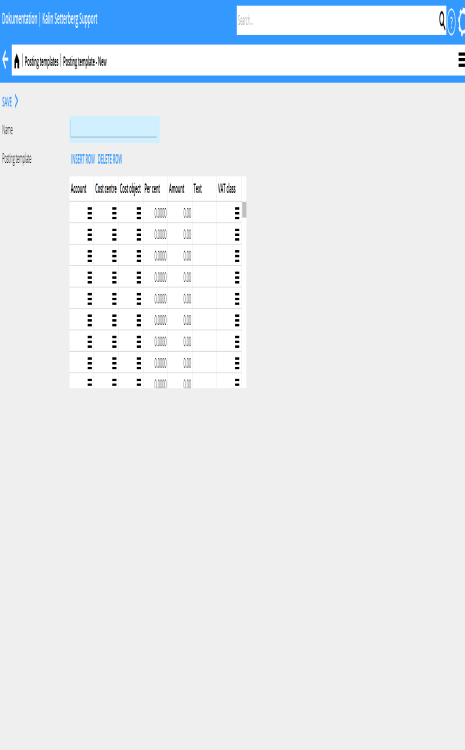
You can create Posting templates in Base registers/PL/Posting templates. Click on New and write a name for the template. Enter account and possible cost centre/cost objects if the account allows it. The amount can be stated either as percentage or as a monetary amount in your currency. If you choose percentage, you will get a question about the total amount at the time you use the template and calculates the share with help of the percentage.
Approval
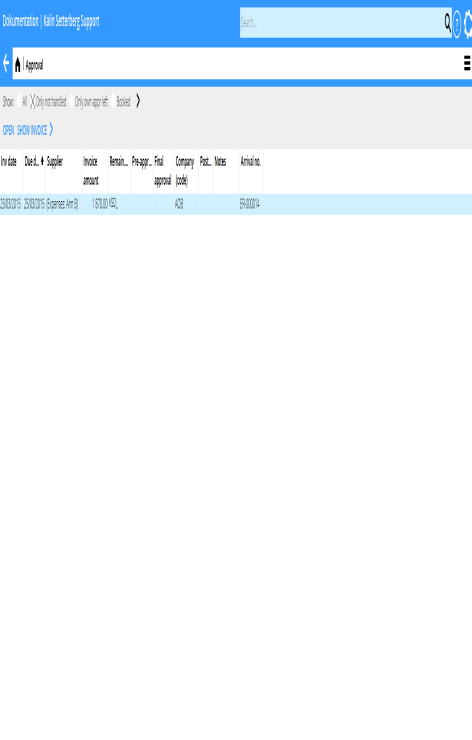
The approver can open the invoices in Frontoffice: Project/Approval for approving and posting. The approval function can also be reached with the link to Approval at the page bottom.
You can see the invoice document with the function Show invoice. If you are authorised you can also approve an invoice without opening it with Direct approval. Select:
| All | Shows all invoices, also those without approvers |
| Only not handled | Shows all unapproved invoices |
| Only own app. left | Shows only the invoices whrer you are the only remaining approver |
| Booked | Shows all booked invoices |
Select an invoice and click Open.
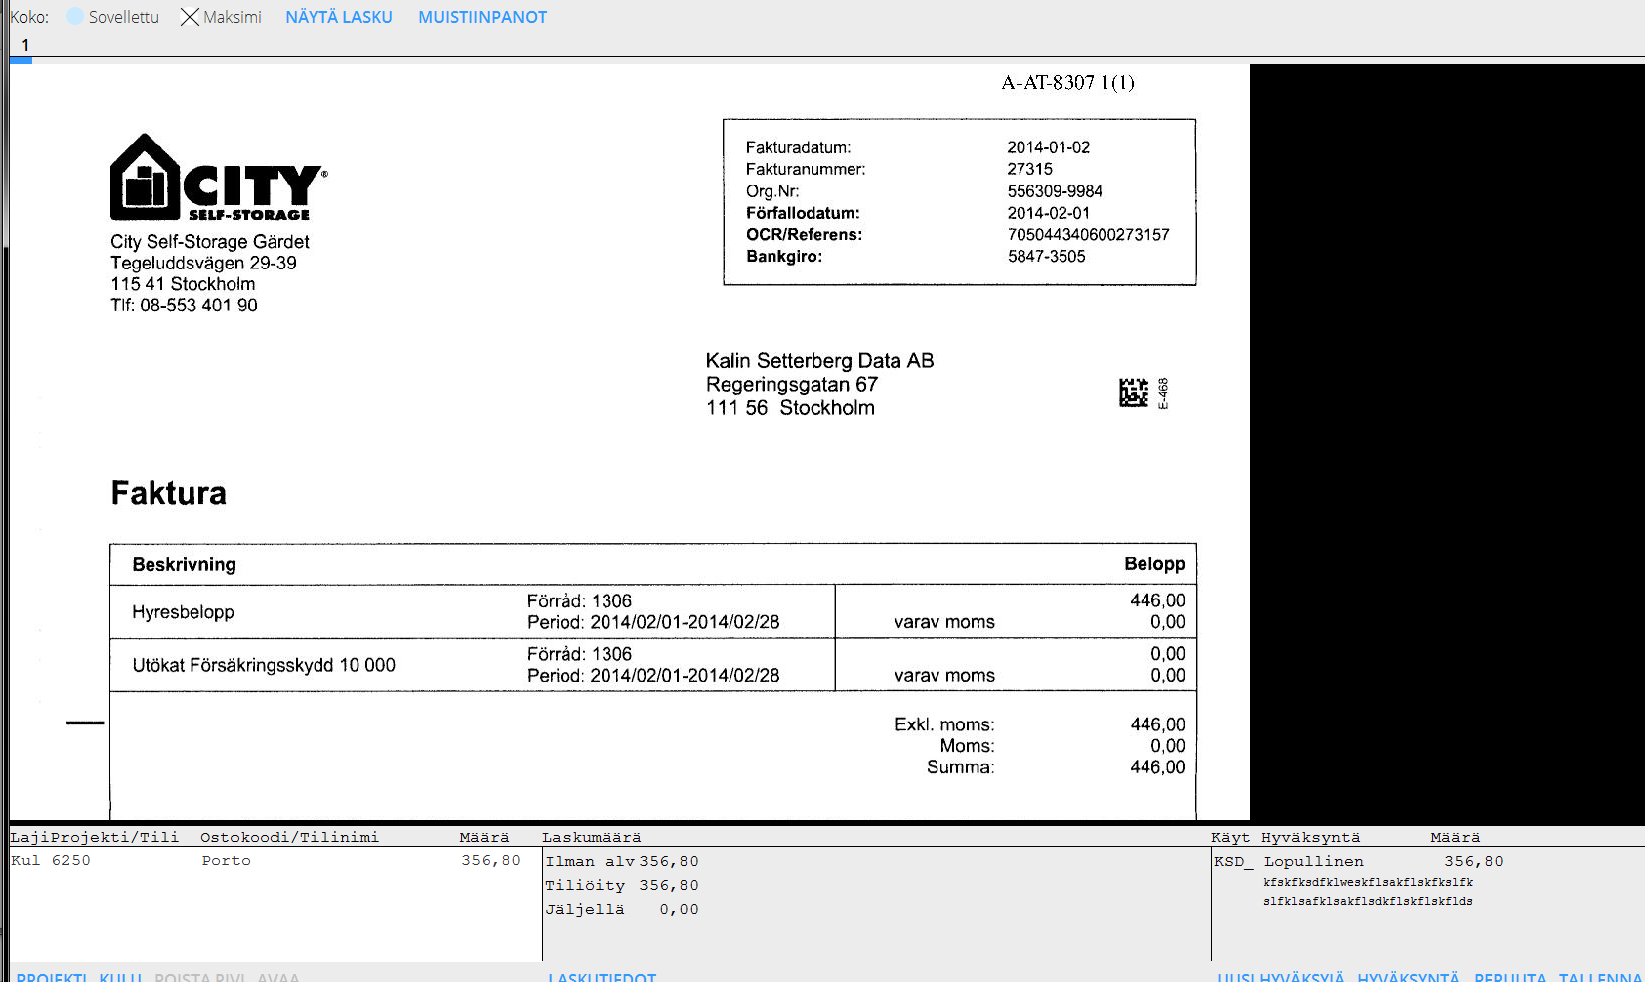
If the invoice already is posted it is shown as one or several posting rows in the field at the bottom left side of the page. Type Pro means project purchase and Type Cost a cost invoice. The field in the middle shows a summary of the invoice with invoice amount, how much that has been posted and how much posting remains. Click on Invoice information to see other invoice details. You can also scroll in the scanned invoice in the upper part of the screen. Click on Show invoice. The function Notes shows all notes that has been made concerning the invoice. You can also make new notes there.
To post a project purchase, select Insert row Project. If you have been using purchase orders and state the PO-number, the remaining contents will be filled in automatically (client, project, purchase code and purchase price). Otherwise, fill in these fields, the purchase price will be fetched from the invoice registration. The mark-up for the purchase price comes from the purchase code in Base registers/Pro/Cost codes Purchases (and in some cases from the project). The sales price is automatically calculated. You can also use the invoice currency, which makes dividing a foreign invoice in several projects easier. The system can be set such that the suggested mark-up not can be changed. The setting is in the Base registers/PA/parameters; tab Purchases and Other, field Change purchase mark-up. In the Adjustments tab there is more alternative in handling mark-ups and sales prices. It is called Special gross purchase as adjustment. When activated, it turns the difference between the suggested and the new sales price into an adjustment.
Use the lower table for posting costs. Write the account number and possible cost centre and -object if the account allows/requires it in the chart of accounts. If the cost shall be allocated over a period (accrued), state cost account only and fill in the fields for periods. The balance sheet account for periodical allocations is fetched from the parameters.
For pre-approval, final approval, partial approval or to state that the invoice not shall be paid, press Approval and select type of approval. You can also write comments regarding the approval. Click on Save approval. You can add approvers to the invoice with the function New approver. Save the whole invoice with Save.
Watch list
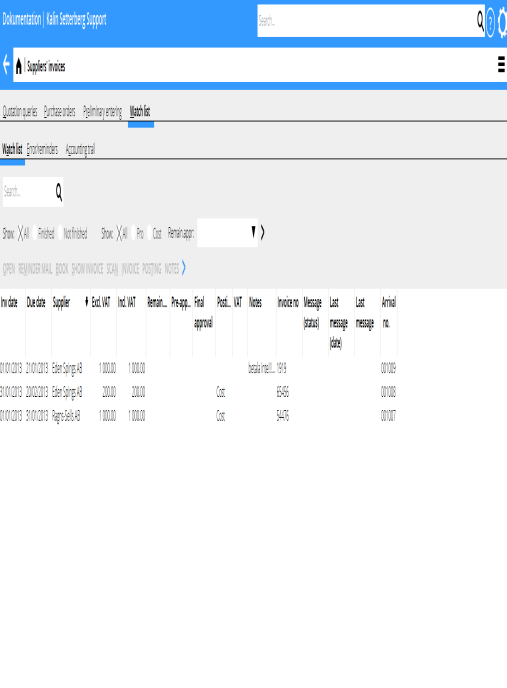
The watch list module is only used by the accounting department. The list shows all preliminary entered, but not booked invoices. List selections:
| All (1) | Shows all invoices regardless of approval status |
| Finished | Shows fully approved invoices |
| Not finished | Shows invoices with at least one remaining approver |
| All (2) | Shows all project- and cost invoices |
| Pro | Shows all project invoices |
| Cost | Shows all cost invoices |
| Rem. appr | You can select a specific approver's unapproved invoices |
| Reminder mail | Selected invoices will be sent as reminders to the approver |
| Book | Book one or several selected invoices that are fully posted and approved. Today's date is suggested as accounting date. |
| Show invoice | Shows the scanned invoice document |
| Scan | Possibility to add documents to the invoice |
| Invoice | Shows invoice information. You can also edit the information here |
| Posting | Shows posting. You can change posting here |
| Notes | Shows notes, possibility to add notes |
Move the mouse pointer over the Posting pro/cost field to see more detailed information. Move the pointer over the employee code to see how much that has been approved and possible comments. If a final approval or a posting is red and in parenthesis it indicates that the whole amount not is approved or that the approver has written a comment.
After booking project related purchases they need to be updates ti the project accounting in Backoffice: Project accounting /Update, tab Purchases. That can also be done automatically; the parameter is in Backoffice: Base registers/Pro/Parameters, tab Purchase and Other. Note that possible existing purchases must be updated manually at the time you check the parameter box.
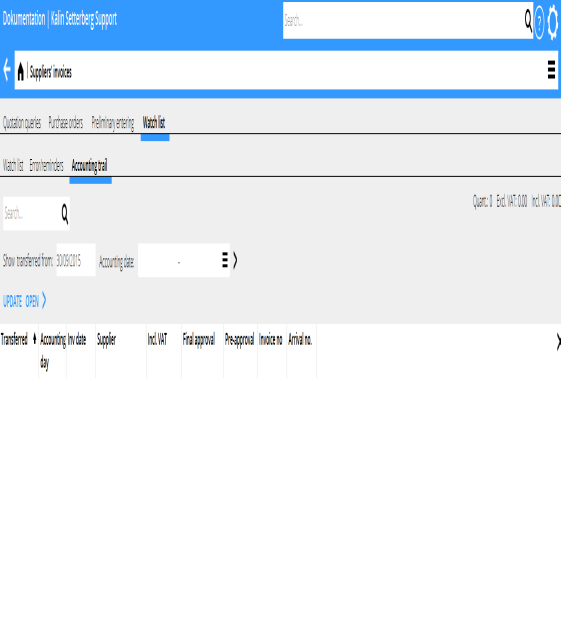
Bookkeping trail
The trail shows the booked invoices. It shows also time and approver and what type of approval it was in the columns Final approval and Pre-approval. Select an invoice and click Open. The same invoice picture and invoice information as in the approval will be shown. It is also possible to read notes here.
