Registrering och attest av leverantörsfakturor
Contents
Allmänt
I Backoffice/Leverantörsreskontra registreras leverantörsfakturor då Marathons attestfunktion används.
Delsystemet består av tre moduler: Ankomstregistrering, Attest och Attestbevakning.
Ankomstregistrering – skanning
Registreringen av fakturor börjar med att fakturadokumenten skannas in i Backoffice/Leverantörsreskontra/Ankomstregistrering. Tryck på Skanning. Lägg en bunt med fakturor i skannern och välj Skanna. Om skanner inte är kopplad till Marathon kan en annan enhet användas för att skanna in dokumenten till datorn, och sedan använda knappen Importera för att få in dokumenten i Marathon.
Kontrollera kvaliteten på den skannade fakturan genom att klicka på miniatyren som kommer upp till vänster i bild. Markera fakturan genom att bocka i rutan vid miniatyren och Spara. Om fakturan innehåller flera sidor så bockas sidorna för i tur och ordning och sparas tillsammans. Märk originalfakturan med AT-numret som visas vid Nästa AT-nr.
En inskannad faktura kan även raderas genom att markera den och trycka på Radera. Med knappen Välj alla markeras alla inskannade dokument. Knappen Ångra lägger tillbaka inskannade och sparade, men ej registrerade fakturor.
Ankomstregistrering
Välj Ny i ankomstregistreringen. Systemet föreslår automatiskt nästa ankomstnummer, men det går att fylla i ett annat nummer. Ankomstnummer är det nummer fakturan blev tilldelad vid skanningen och är kopplat till det inskannade dokumentet. Titta på den inskannade fakturan i fliken Inskannat dokument och jämför med originalet så att allt överensstämmer. Fyll i uppgifter om leverantör, fakturanummer, datum och fakturabelopp inklusive moms. (Momsbeloppet kan räknas ut automatiskt med eller utan decimaler genom en parameterinställnin i Basregister/Lev/Parametrar fliken Fakturor vid fältet Uträkning av momsbelopp.) Välj en eller flera attestörer och spara, eller gå vidare till Kontering.
Kontering
Fakturan kan redan nu konteras i fliken Kontering.
Kontering av projektinköp görs i den övre tabellen. Vid kontering av projektinköp fylls inget konto i eftersom det redan är förinställt i parametrarna. Ange eventuellt rekvisition om detta används, varpå resterande uppgifter om kund, projekt, inköpskod och inpris automatiskt fylls på. I annat fall fyll i dessa uppgifter, inpriset hämtas då från registreringen av fakturan. Pålägget på inpriset hämtas från inköpskoden i Basregister/Pro/Kostnadskoder Inköp (och i vissa fall från projektet), och utpriset räknas automatiskt ut. Systemet kan ställas in så att det föreslagna pålägget inte kan ändras. Inställningen görs i Basregister/Pro/Parametrar fliken Inköp och Övrigt vid kryssrutan Ändra inköpspålägg. I fliken Justering finns ytterligare en parameter som påverkar hur ändringar av påslag och utpris ska hanteras. Den heter Avvikande inköpsbrutto som justering, och med den aktiverad blir mellanskillnaden mellan det föreslagna utpriset och det nya utpriset en justering.
Vid kontering av omkostnader ska kontot anges i den nedre tabellen. Kostnadsställe och kostnadsbärare kan anges men endast om kontot i kontoplanen tillåter det. Om kostnaden ska periodiseras anges endast kostnadskontot och period från och period till. Balanskontot för periodiseringar hämtas från parametrarna.
Konteringen för projektinköp eller omkostnader kan även göras i fakturavalutan i fältet Belopp fakturavaluta. Detta underlättar uppdelningen av utländska fakturor på flera olika projekt eller konton.
Med Hämta mall kan Konteringsmallar skapade i Basregister/Lev/Konteringsmallar användas, se beskrivning under Skapa konteringsmall.
Då alla skannade fakturor är ankomstregistrerade skickas de till attestörerna genom knappen Maila i Backoffice/Leverantörsreskontra/Attesbevakning.
Mailet skickas till alla attestörer på oattesterade fakturor som inte redan fått mejl om respektive faktura. Även om attestören inte mailas finns fakturorna i Frontoffice/Projekt/Attest hos respektive person.
Skapa konteringsmall
Konteringsmallar skapas i Basregister/Lev/Konteringsmallar. Tryck på Ny, och namnge mallen. Fyll i konto och eventuellt kostnad. Ange antingen en procentuell del av ett belopp, eller ett belopp i SEK. Om en procentuell del anges frågar systemet efter totalbeloppet när mallen används, och räknar ut andelen med hjälp av procentsatsen.
Attest
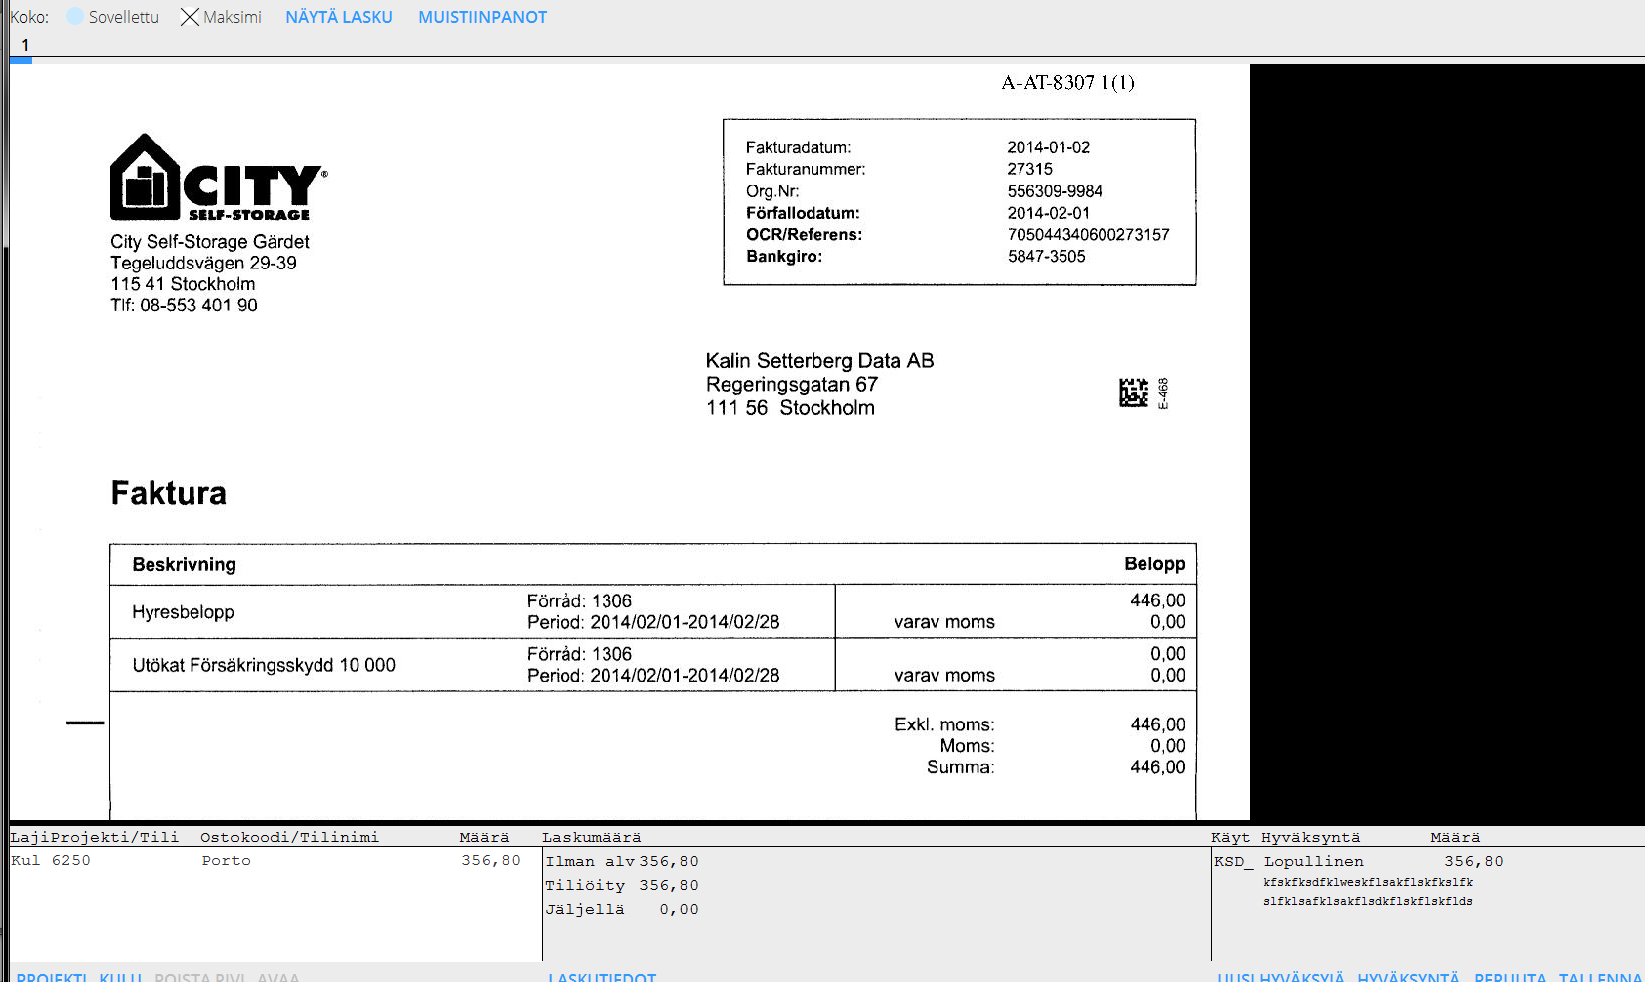
I Frontoffice/Projekt/Attest kan attestören öppna fakturorna för att attestera och kontera dem. Attestfunktionen kan även nås via snabblänken längst ned i fönstret som syns markerad i bild.
Med Visa faktura kan fakturadokumentet visas. Med Direktattest kan fakturan attesteras utan att den öppnas, detta är dock behörighetsstyrt. Välj att visa
| Alla | Visar alla fakturor, även de utan attestörer |
| End obehandlade | Visar alla oattesterade fakturor |
| End egen att kvar | Visar endast de fakturor där du står ensam kvar som attestör |
| Bokförda | Visar alla bokförda fakturor |
Select an invoice and click Open.
If the invoice already is posted it is shown as one or several posting rows in the field at the bottom left side of the page. Type Pro means project purchase and Type Cost a cost invoice. The field in the middle shows a summary of the invoice with invoice amount, how much that has been posted and how much posting remains. Click on Invoice information to see other invoice details. You can also scroll in the scanned invoice in the upper part of the screen. Click on Show invoice. The function Notes shows all notes that has been made concerning the invoice. You can also make new notes there.
To post a project purchase, select Insert row Project. If you have been using purchase orders and state the PO-number, the remaining contents will be filled in automatically (client, project, purchase code and purchase price). Otherwise, fill in these fields, the purchase price will be fetched from the invoice registration. The mark-up for the purchase price comes from the purchase code in Base registers/Pro/Cost codes Purchases (and in some cases from the project). The sales price is automatically calculated. You can also use the invoice currency, which makes dividing a foreign invoice in several projects easier. The system can be set such that the suggested mark-up not can be changed. The setting is in the Base registers/PA/parameters; tab Purchases and Other, field Change purchase mark-up. In the Adjustments tab there is more alternative in handling mark-ups and sales prices. It is called Special gross purchase as adjustment. When activated, it turns the difference between the suggested and the new sales price into an adjustment.
Use the lower table for posting costs. Write the account number and possible cost centre and -object if the account allows/requires it in the chart of accounts. If the cost shall be allocated over a period (accrued), state cost account only and fill in the fields for periods. The balance sheet account for periodical allocations is fetched from the parameters.
For pre-approval, final approval, partial approval or to state that the invoice not shall be paid, press Approval and select type of approval. You can also write comments regarding the approval. Click on Save approval. You can add approvers to the invoice with the function New approver. Save the whole invoice with Save.
Watch list
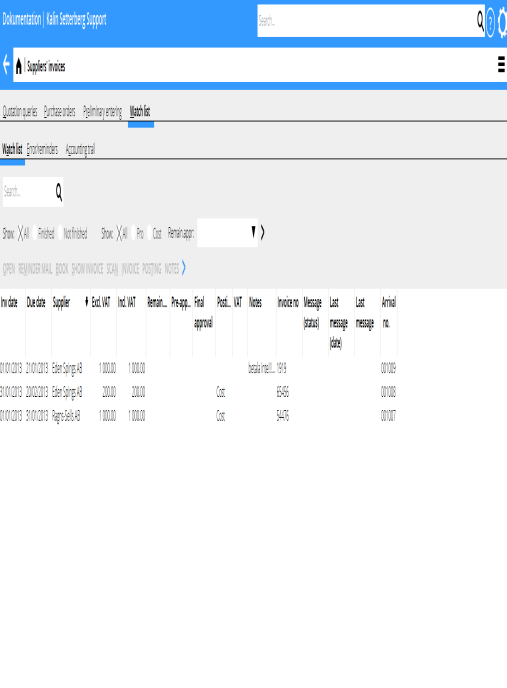
The watch list module is only used by the accounting department. The list shows all preliminary entered, but not booked invoices. List selections:
| All (1) | Shows all invoices regardless of approval status |
| Finished | Shows fully approved invoices |
| Not finished | Shows invoices with at least one remaining approver |
| All (2) | Shows all project- and cost invoices |
| Pro | Shows all project invoices |
| Cost | Shows all cost invoices |
| Rem. appr | You can select a specific approver's unapproved invoices |
| Reminder mail | Selected invoices will be sent as reminders to the approver |
| Book | Book one or several selected invoices that are fully posted and approved. Today's date is suggested as accounting date. |
| Show invoice | Shows the scanned invoice document |
| Scan | Possibility to add documents to the invoice |
| Invoice | Shows invoice information. You can also edit the information here |
| Posting | Shows posting. You can change posting here |
| Notes | Shows notes, possibility to add notes |
Move the mouse pointer over the Posting pro/cost field to see more detailed information. Move the pointer over the employee code to see how much that has been approved and possible comments. If a final approval or a posting is red and in parenthesis it indicates that the whole amount not is approved or that the approver has written a comment.
After booking project related purchases they need to be updates ti the project accounting in Backoffice: Project accounting /Update, tab Purchases. That can also be done automatically; the parameter is in Backoffice: Base registers/Pro/Parameters, tab Purchase and Other. Note that possible existing purchases must be updated manually at the time you check the parameter box.
Bookkeping trail
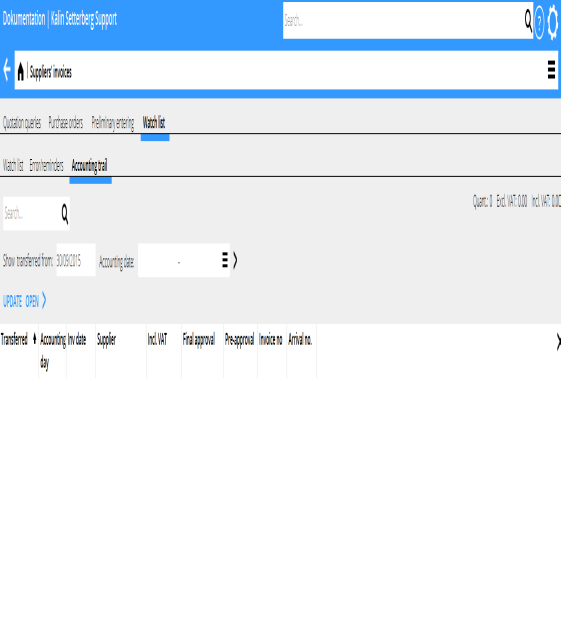
The trail shows the booked invoices. It shows also time and approver and what type of approval it was in the columns Final approval and Pre-approval. Select an invoice and click Open. The same invoice picture and invoice information as in the approval will be shown. It is also possible to read notes here.


