Ajan, Ostojen ja Muun korjaus
Ohje väärin kirjattujen tuntien, ostojen ja muun korjaamisesta.
Ajan korjaus
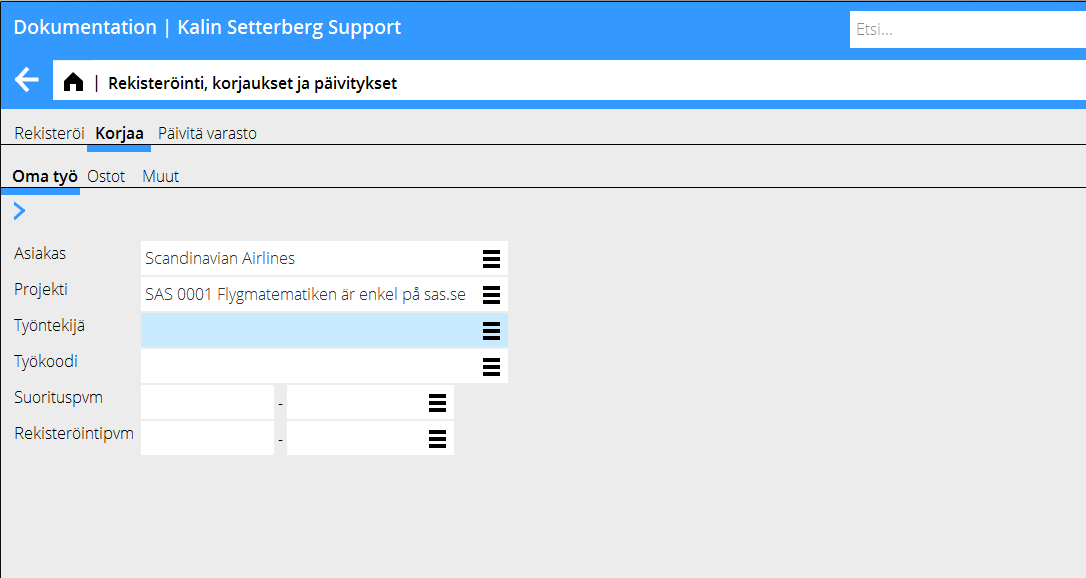
Mene ohjelmaan Projekti: Rekisteröinti, korjaus ja päivitys. Mene välilehdelle Korjaa, sen jälkeen välilehdelle Oma työ.
Rajaa osumalistaa ilmoittamalla projekti, työntekijä, tms. Klikkaa Hae.
Huom! Jos ohjelma ilmoittaa, että ”Ei päivitettyjä tapahtumia löytyy”, tarkista välilehdeltä Päivitä Varasto ja varmista, ettei valitsemasi erä ole siellä. Näin vältyt päällekkäisiltä korjauksilta
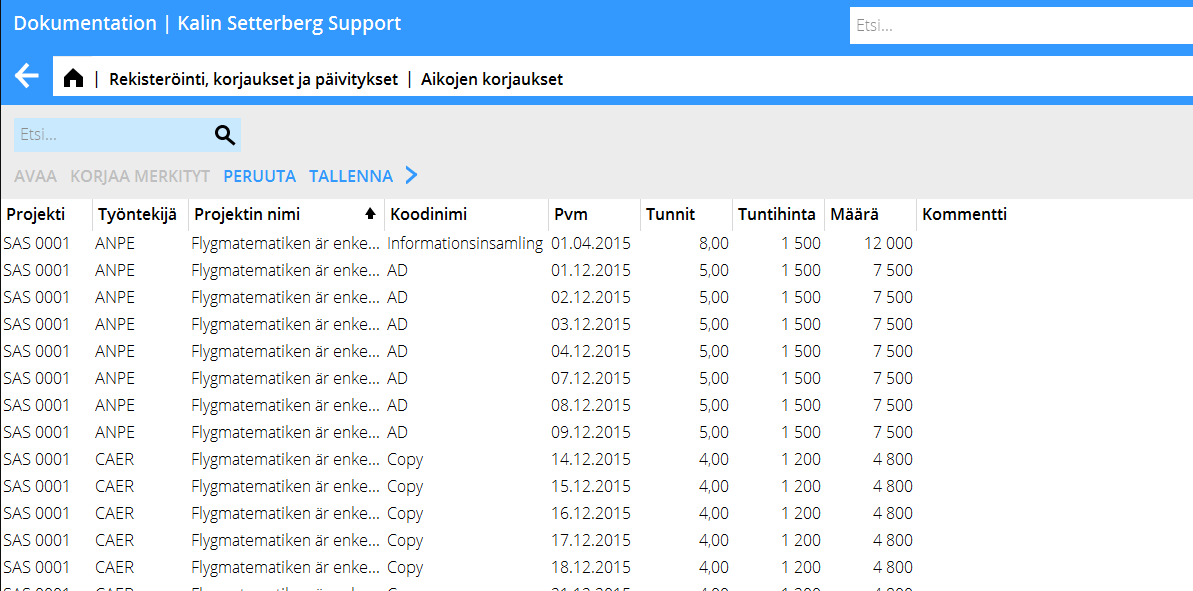
Valitse osumalistasta rivi ja klikkaa Avaa. Voit valita useamman rivin painamalla Ctrl-painiketta valitessasi rivit. Klikkaa sen jälkeen Korjaa merkityt.
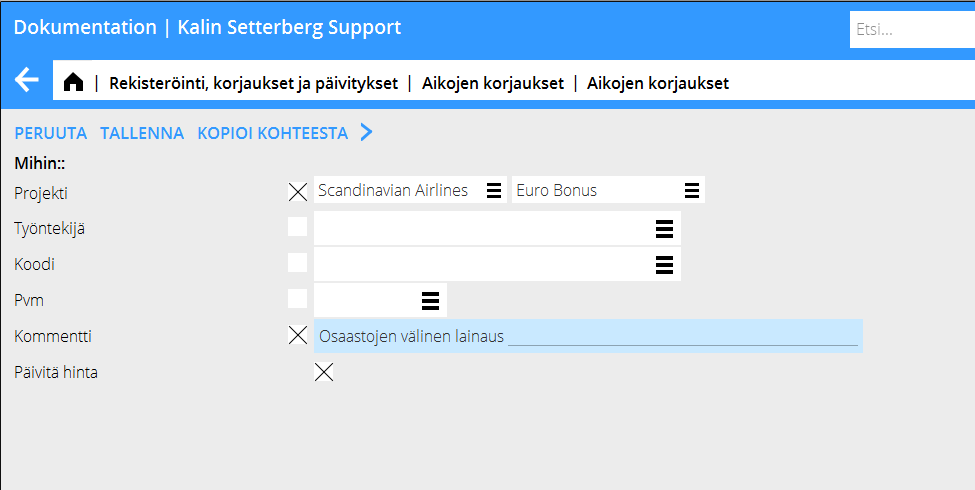
Voit nyt siirtää aikaa toiselle projektille, koodille tai työntekijälle. Muuta vain kohdat, jotka haluat muuttaa, loput jää ennalleen. Jos haluat, että pelkästään hinnat päivitetään, rastita ruutu ”Päivitä hinnat”. Tallenna.
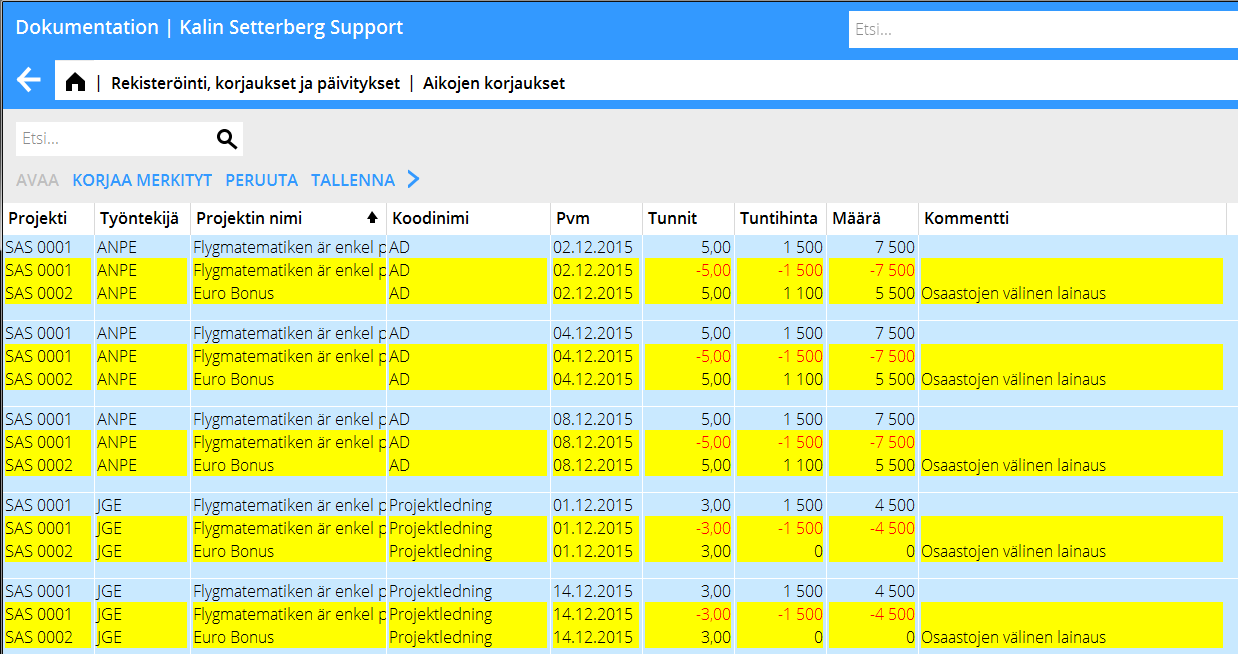
Lista näyttää nyt muutetut plus- ja miinuserät keltaisena. Tarkista lista ja paina OK tallentaaksesi muutokset. Jos haluat, rastita ruutu Automaattinen Varaston päivitys tallentamisen yhteydessä, niin sinun ei tarvitse päivittää varastoa käsin. Täällä tehdyt muutokset näkyvät sekä täällä että ajanraportoinnissa.
Correction of purchases and other
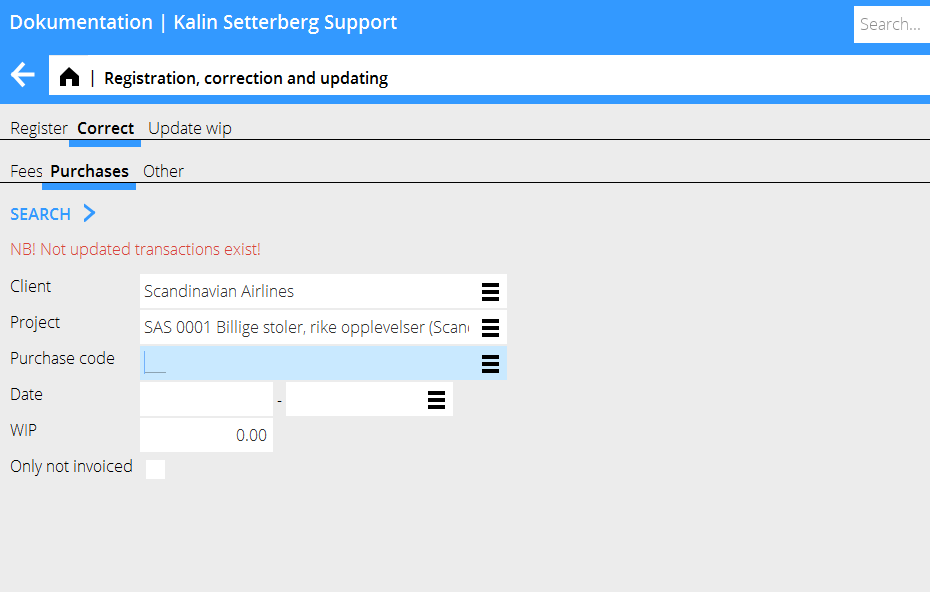
Go to Project: Registration, correction and updating and select Correct, then either Purchases or Other. NB! If the text ”NB! Not updated transactions exist!” is shown in the search box , you should check in the program Update, that the record you want to correct not is in that tab. Otherwise there is a risk of double corrections.
Limit the list of hits by specifying e.g. project. Press Search.
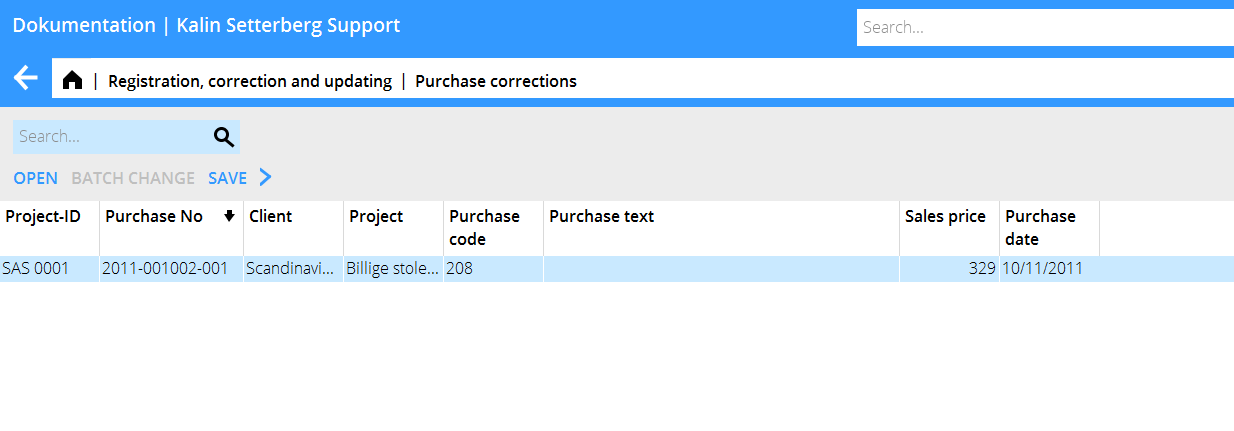
A list of the registered purchases/other – records is shown. Select the record that you wish to change and press Open. If you want to change several records, press Ctrl key and select them, thereafter press Batch change.
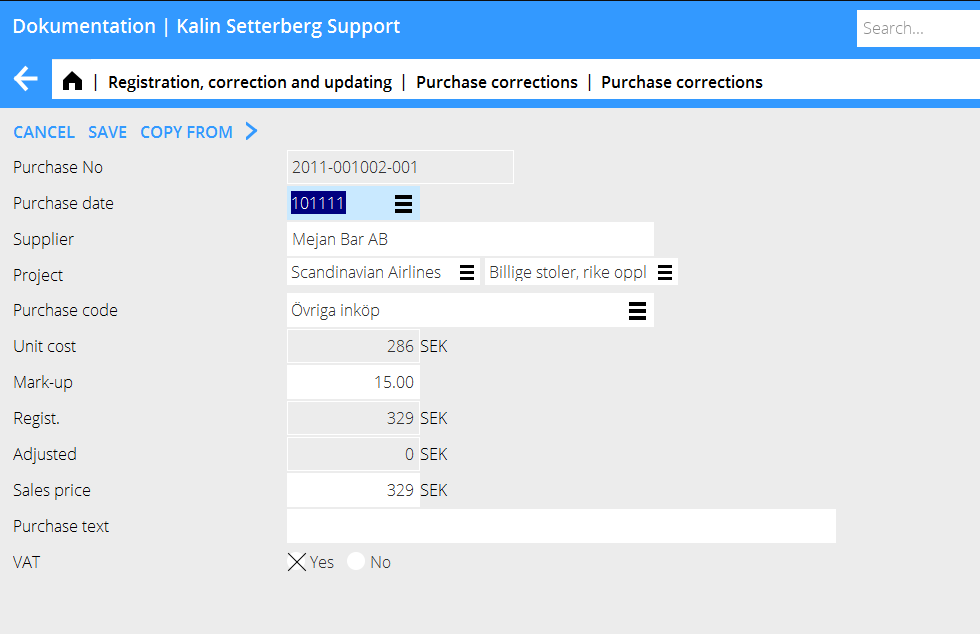
You can now move purchases/other to another project. Fill in only the fields that shall be changed, the rest will remain the same. Press Save.
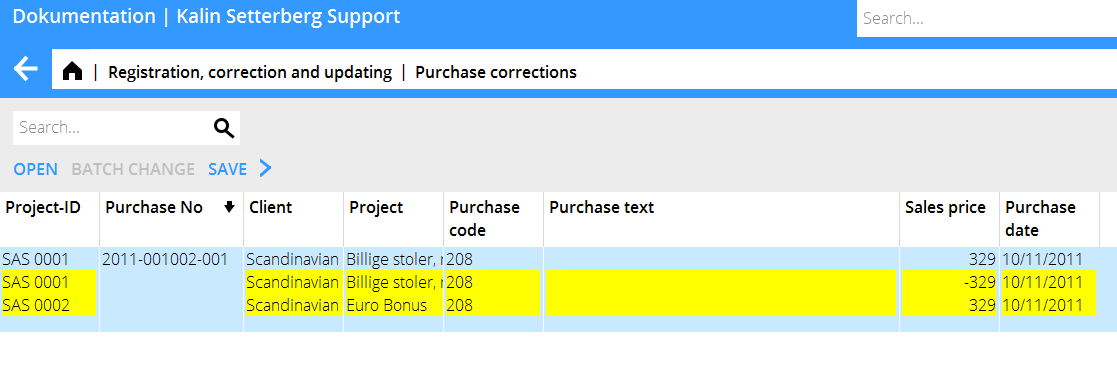
The list now shows changed plus- and minus records highlighted in yellow. Check that everything is OK and click Save. If you wish , you can check the box Automatic WIP update when saving.
