Tositteiden rekisteröinti
Contents
Rekisteröi tositteita ilman integraatiota muihin osajärjestelmiin
Tositteet rekisteröidään ohjelmassa Taloushallinto: Tositteet. Standarditositesarjalla on alkutunnus BO, mutta jos tarvitset useita tositesarjoja, niitä voi luoda ohjelmassa Järjestelmä: Perusrekisterit/KP/Tositesarjat. Yhteistä kaikille on, että ne koostuvat kahdesta merkistä, joista ensimmäinen on B.
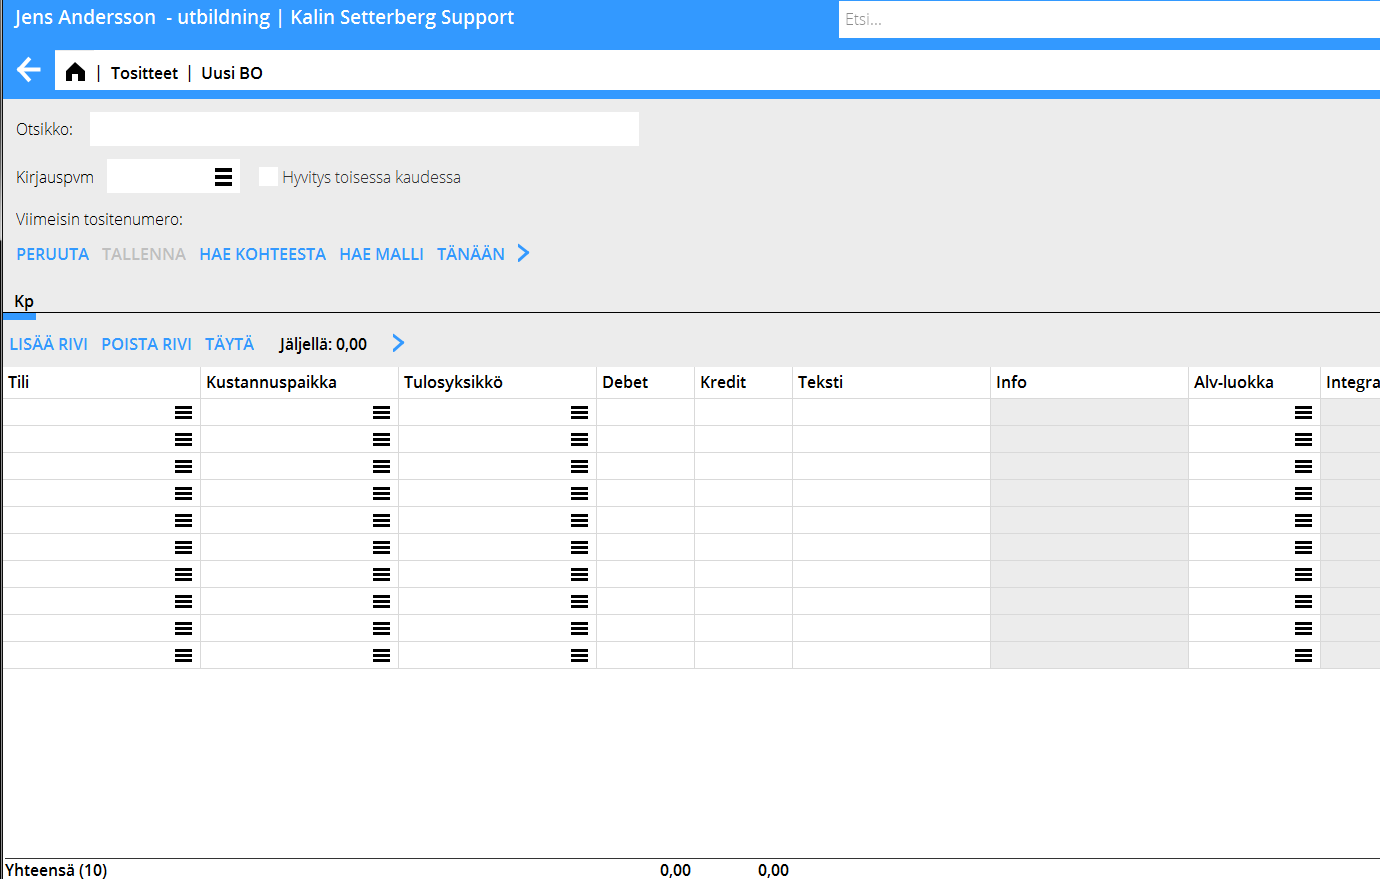
Valitse sarja ja valitse toiminta Uusi. Aloita aina rekisteröinti ilmoittamalla kirjauspäivämäärä.
Yksinkertaisessa tositerekisteröinnissä on kaksi tai enemmän tiliä, sekä määrät debetissä ja kreditissä. Muut valinnat ovat:
| Hae | Voit hakea listan aikaisemmista tositteista ja kopioida siitä. |
|---|---|
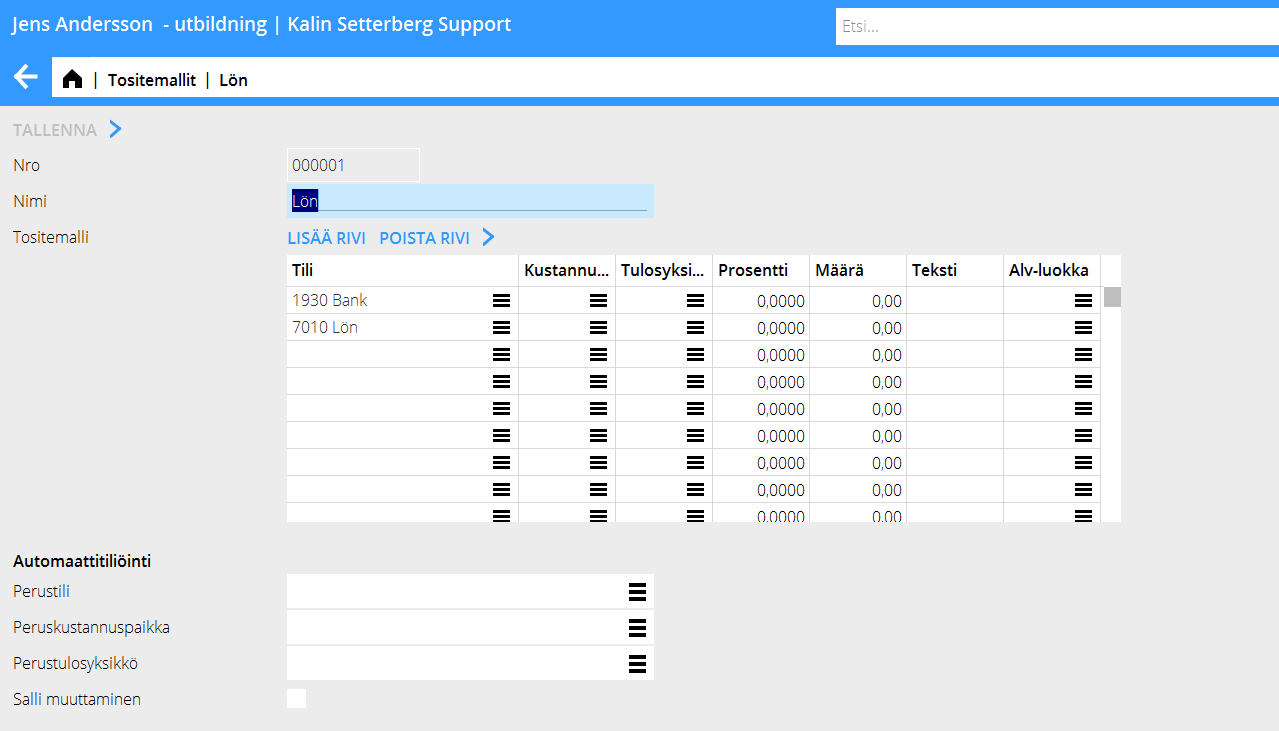
| Hae malli | Voit luoda tositemallin usein toistuville tositteille ohjelmassa Perusrekisterit/KP/Tositemallit. Lue lisää täältä: Luo tositemalli. |
| Tuo | Hakee sie-tiedostoja (Ruotsissa käytettäviä veroviraston tietoja) |
| Hyvitä toisessa kaudessa | Hyvittää tositteen toisella kirjauspäivällä. |
| Kirjauspäivä + Tänään | Kirjauspäiväkenttä on aina oltava täytettynä ennen kuin muita tietoja voi alkaa syöttää. Valitse Tänään, jos haluat käyttää päivän päiväystä. Ilmoittamaasi päivää ehdotetaan myös seuraavassa tositteessa. |
| Otsikko | Otsikko näkyy tositerekisteröinnin alkusivulla. Voit hakea tositteita otsikon avulla hakuruudusta |
| Tositenumero | Tositenumero haetaan automaattisesti ohjelmasta Perusrekisterit/KP/Tositesarjat |
| Tili | Ilmoita tili. |
| Kust.paikka/tulosyksikkö | Ilmoitetaan, mikäli tili hyväksyy tai vaatii tiedot. |
| Debet/Kredit | Ilmoita määrät |
| Dimensiot | Mikäli käytätte kirjanpidossa dimensioita, ne näkyvät erillisinä sarakkeina. Dimensiot määritellään Perusrekistereissä/KP/Parametri, välilehdellä Dimensiot. Manuaalisesti luotuja dimensioita voi muokata ohjelmassa Perusrekisterit/KP/Dimensiot. |
| Teksti | Kenttä valinnaiselle tekstille (25 merkkiä). Teksti näkyy pääkirjassa ja tilin erittelyssä. |
| Summa | Taulukon alaosassa debet- ja kreditsarakkeet summataan. Tositteen on täsmättävä, jotta sen voisi tallentaa. |
| Luo Alvin tiliöinti | Mikäli käytössänne on Marathon alv-velkakäsittely, voit tässä luoda alville automaattisen tiliöinnin. Marathon laskee tiliöinnin sen perusteella, mitä eri alv-luokille on ilmoitettu ja hakee myös alv-luokalle ilmoitetun alv-tilin. |
| Täytä | Täyttää puuttuvan määrän tositteen täsmäämiseksi, edellyttäen että tili on ilmoitettu. |
| Jäännös | Näyttää määrän, joka on vielä jäljellä ennen kuin tositteen voi tallentaa. |
Luo tositemalli
Tositemallit luodaan Perusrekistereissä/KP/Tositemallit. Valitse Uusi ja anna mallille nimi. Ilmoita tili ja mahdollinen kustannuspaikka/tulosyksikkö, mikäli tili sallii sen. Ilmoita joko prosenttiosa määrästä tai määrä perusvaluutassa. Jos käytät prosenttiosaa, ohjelma kysyy mallia käyttäessä kokonaissummaa, jonka avulla se laskee prosenttiosan määrästä.
Rekisteröi tosite, joka on integroitu toiseen osajärjestelmään
Jos ilmoittamasi tili on integroitu toiseen osajärjestelmään, kuvaan ilmestyy toinen välilehti, joka on keltainen ja jossa on ko. osajärjestelmän nimi. Siihen rekisteröidään ne tiedot, jotka liittyvät osajärjestelmään. Tähän manualiin olemme ottaneet mukaan tavallisimmat osajärjestelmäintegraatiot.
Asiakasmaksut
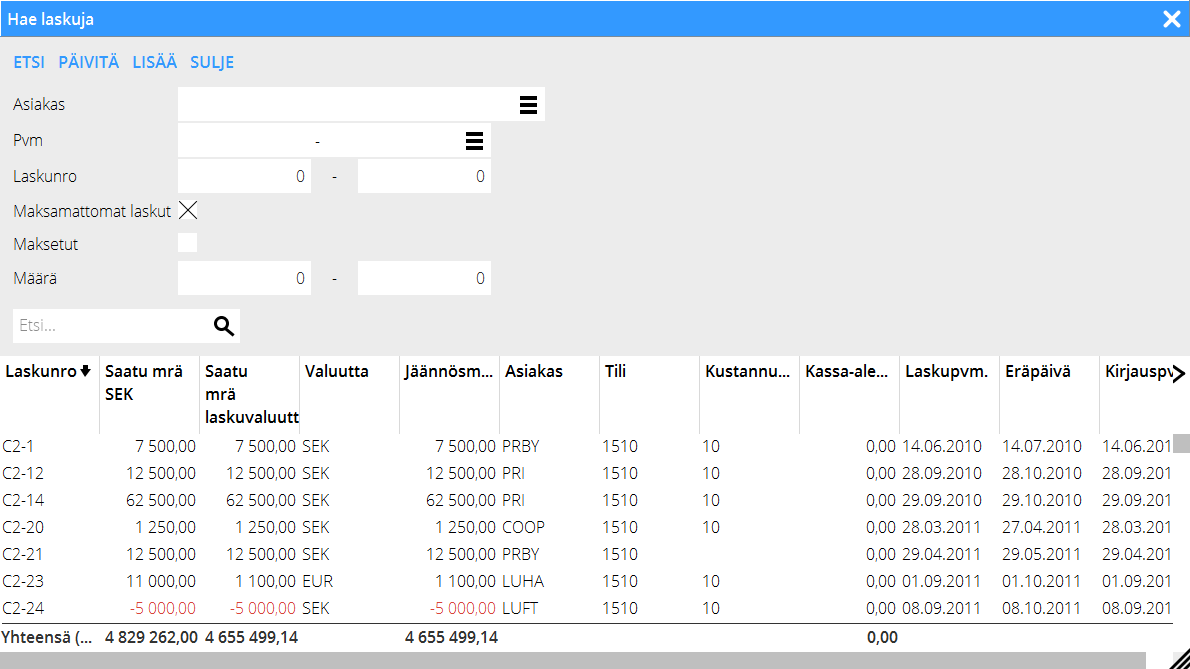
Myyntisaamistili on integroitu myyntireskontraan. Kun siis kirjaat tälle tilille, ohjelma luo uuden välilehden, jossa lukee MR X (X= välilehden numero). Asiakkaiden maksut rekisteröidään tälle välilehdelle. Ilmoita maksetun laskun laskunumero tai hae laskuja toiminnalla Hae laskuja. Voit käyttää asiakasta, päivämääriä, laskunumeroa, ym. hakukriteerinä.
The whole invoice amount is fetched into the table. If only a part of the invoice has been paid, write the received amount over the amount in the Rec. amt (your currency) – field. If the payment is in a foreign currency this field is empty and you must write in the amount that the bank has received. The currency discrepancy that might occur is automatically posted on an account defined for that (Base registers/SL/Parameters: Acc for currency rate profits and Acc for currency rate losses).
If a foreign invoice is partly paid, write the received amount both in Rec. amt (your currency) and Rec. amt invoice currency. The remaining difference will be a residue and a possible rate discrepancy (if received amount in your currency divided with the rate doesn't correspond with the amount in the field Rec. amt Invoice, the difference will be a rate discrepancy).
After registration of the invoices, go back to the GL tab and enter an account for the payment (e.g. bank account). If you press the function Fill here, the remaining will be posted on the account.
Supplier payments
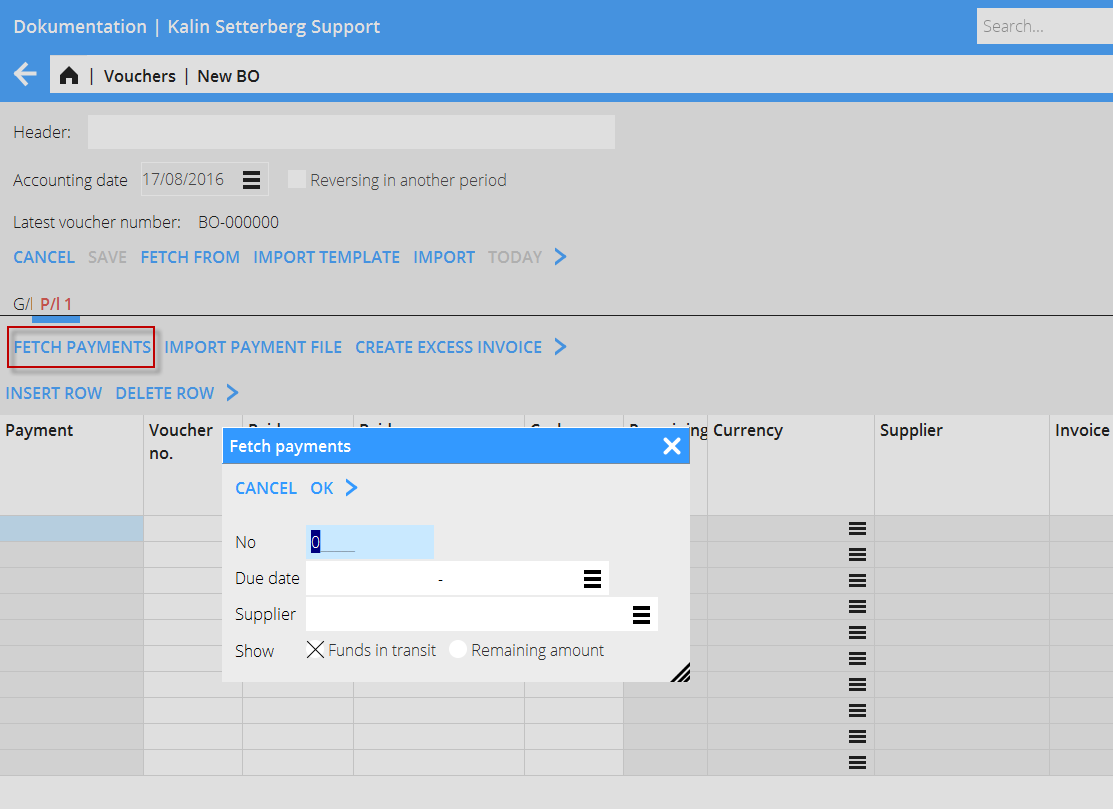
The account payable is assigned to the purchase ledger, which means that when you enter the account, the system creates a tab called PL followed by the tab number. Register the payments in the tab. Enter invoice number of the paid invoice or search a created payment with the function Fetch payments. Here you can search on payment number, date or supplier. You can also find invoices with residues. Ther e is also a function for importing a payment file.
The whole invoice amount is fetched into the table. If only a part of the invoice has been paid, write the paid amount over the amount in the Rec. amt (your currency) – field. If the payment is in a foreign currency this field is empty and you must write in the amount that the bank has sent. The currency discrepancy that might occur is automatically posted on an account defined for that (Base registers/SL/Parameters: Acc for currency rate profits and Acc for currency rate losses).
If a foreign invoice is partly paid, write the paid amount both in Rec. amt (your currency) and Rec. amt invoice currency. The remaining difference will be a residue and a possible rate discrepancy (if received amount in your currency divided with the rate doesn't correspond with the amount in the field Rec. amt Invoice, the difference will be a rate discrepancy).
After registration of the invoices, go back to the GL tab and enter an account for the payment (e.g. bank account). If you press the function Fill here, the remaining will be posted on the account.
Create excess invoice
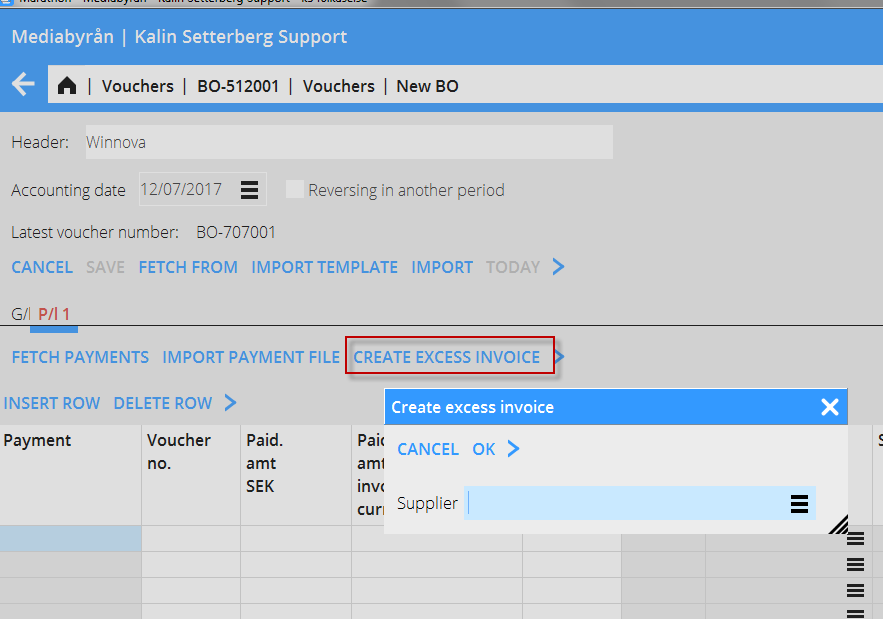
With this function, you can register a pre-paid amount in the purchase ledger directly, even when the supplier's invoice hasn't arrived yet. The payment gets an LA -number.
Enter supplier and an amount.
Enter project purchase
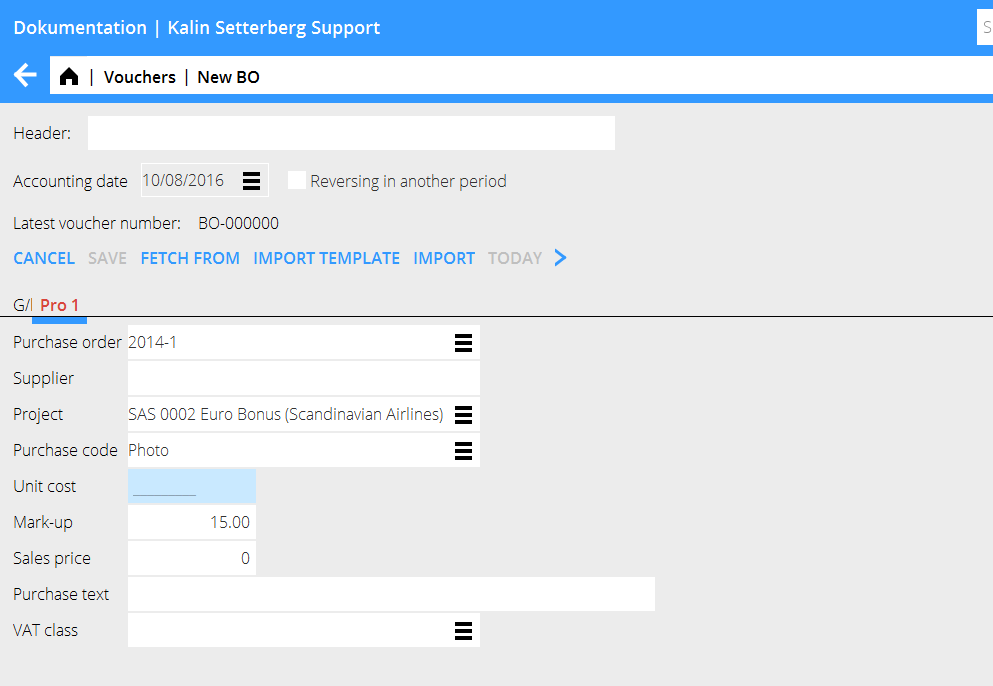
The account for project purchases is assigned to the project management, which means that when you enter the account, the system creates a tab called PRO followed by the tab number. Register purchases that shall be charged a project in the tab. Enter project, purchase code and a purchase price. The sales price is automatically calculated with the mark-up percentage that has been defined on the purchase code. In many cases the mark -up can be changed (there is a parameter setting for that option) if you want to change it. Write optional purchase text. If you have been using purchase orders at the project purchase, you can enter it here and the system will fetch all contents from it. Make the contrary posting in the tab GL.
Enter periodical allocations
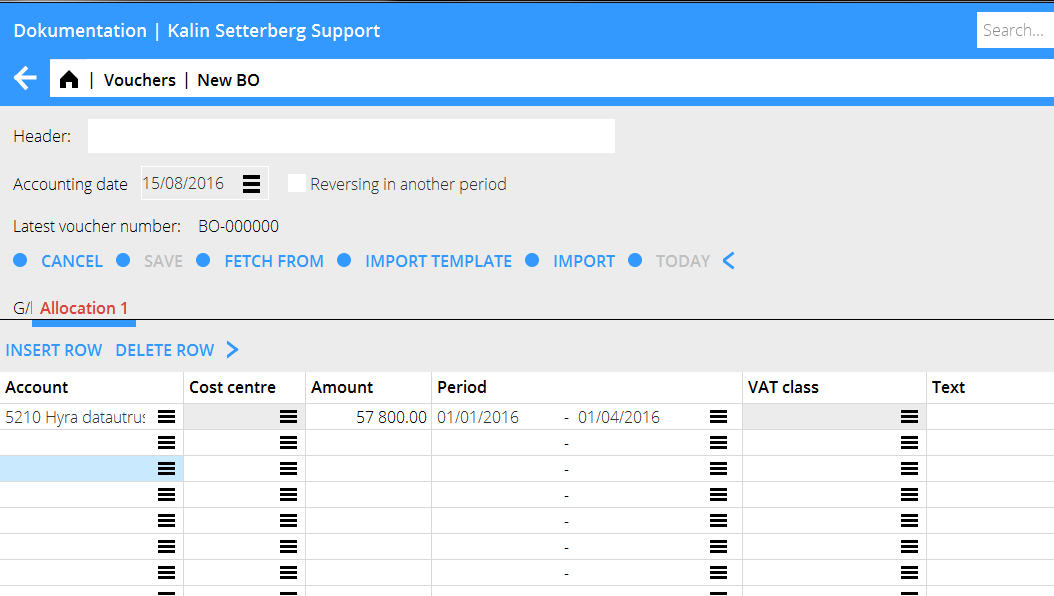
The account for accruals (periodical allocations) is assigned to periodical allocations, which means that when you enter the account, the system creates a tab called Allocations followed by the tab number. Enter the costs that shall be allocated over a certain period. Enter cost account, amount and the period for the allocation. You can enter the date in two different ways: MMYY– MMYY or DDMMYY. In the first case the amount is allocated evenly on all months, in the latter depending on how many days each month has. Make the contrary posting in the GL tab
Enter assets (inventories)
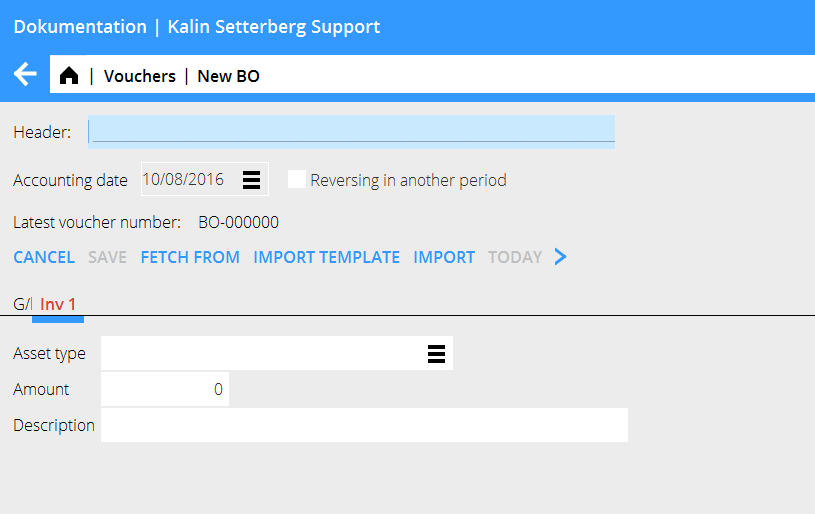
The account for inventories is assigned to the inventory ledger, which means that when you enter the account, the system creates a tab called INV. If the acquisition account only is connected to one asset type, it will show automatically. If not, select asset type. Write amount and a possible description. Make the contrary posting in the GL tab.
Correct a voucher
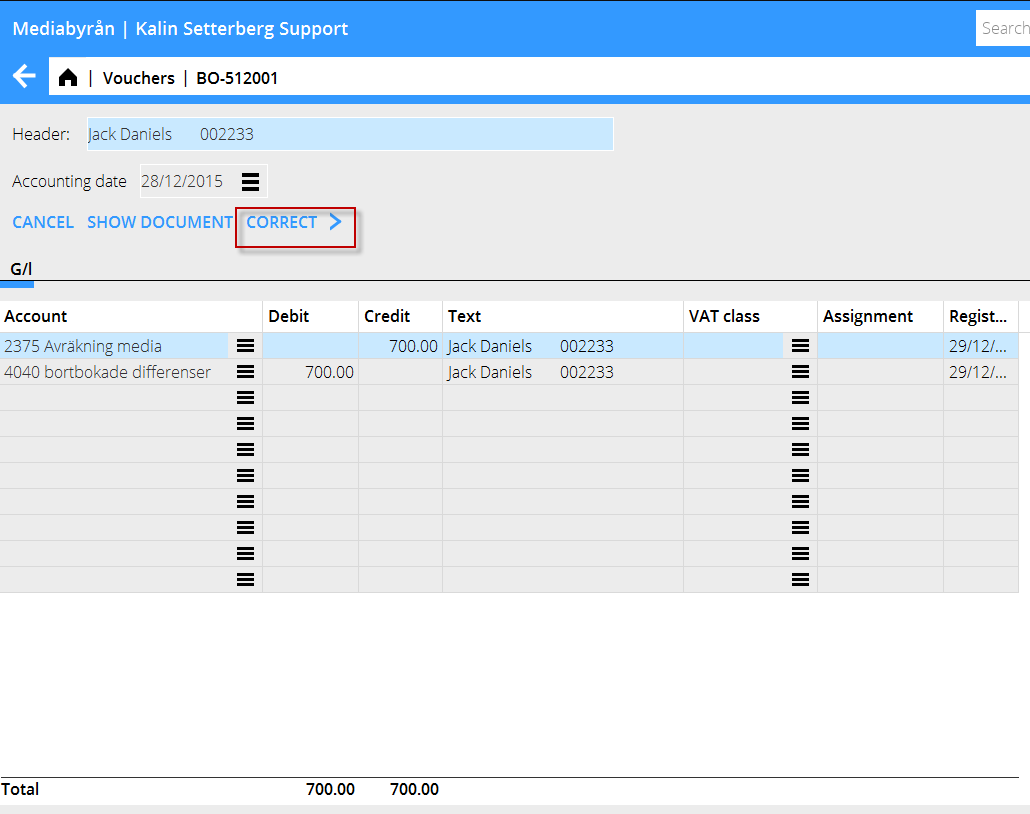
Select the voucher that you want to correct and press Open. Then press Correct.
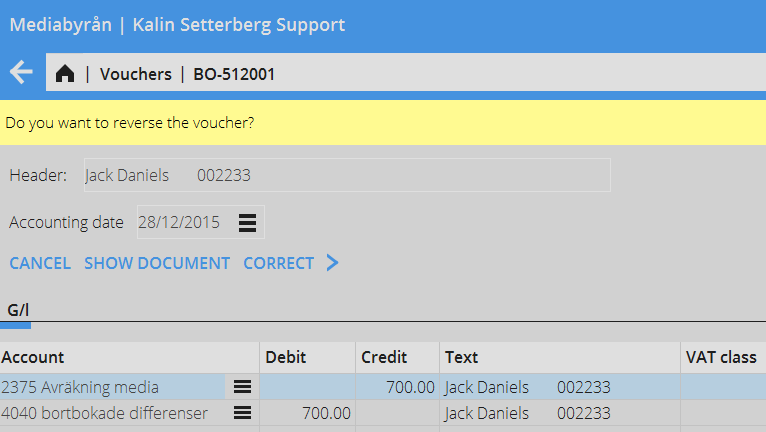
Marathon asks you if you want to reverse the voucher.
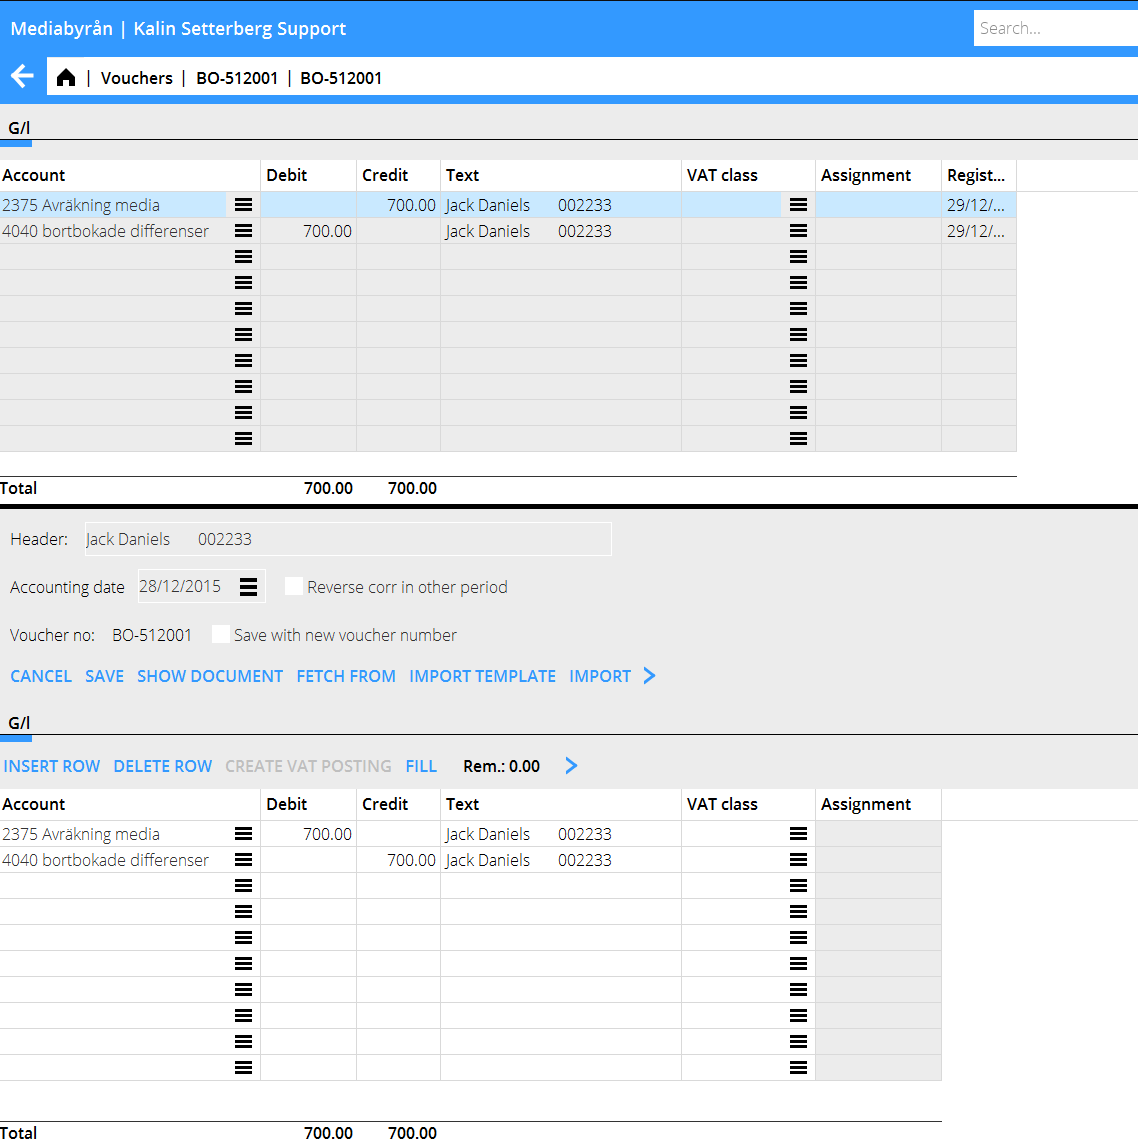
Click on Yes if you want to reverse the whole voucher. If you want to reverse the correction in another period, check the box Reverse corr in another period and select Reversing date at the top of the screeen.
The reversing can also be saved with the same date, but with a new voucher number. Use “Save withnew voucher number”.
Select No if the voucher shall be corrected and not reversed. Make the correction in the lower table. Also here you can reverse the correction in another period and/or save with the same date but a new voucher number.
