Registrering av verifikationer
Contents
Registrering av verifikation utan integration till annat delsystem
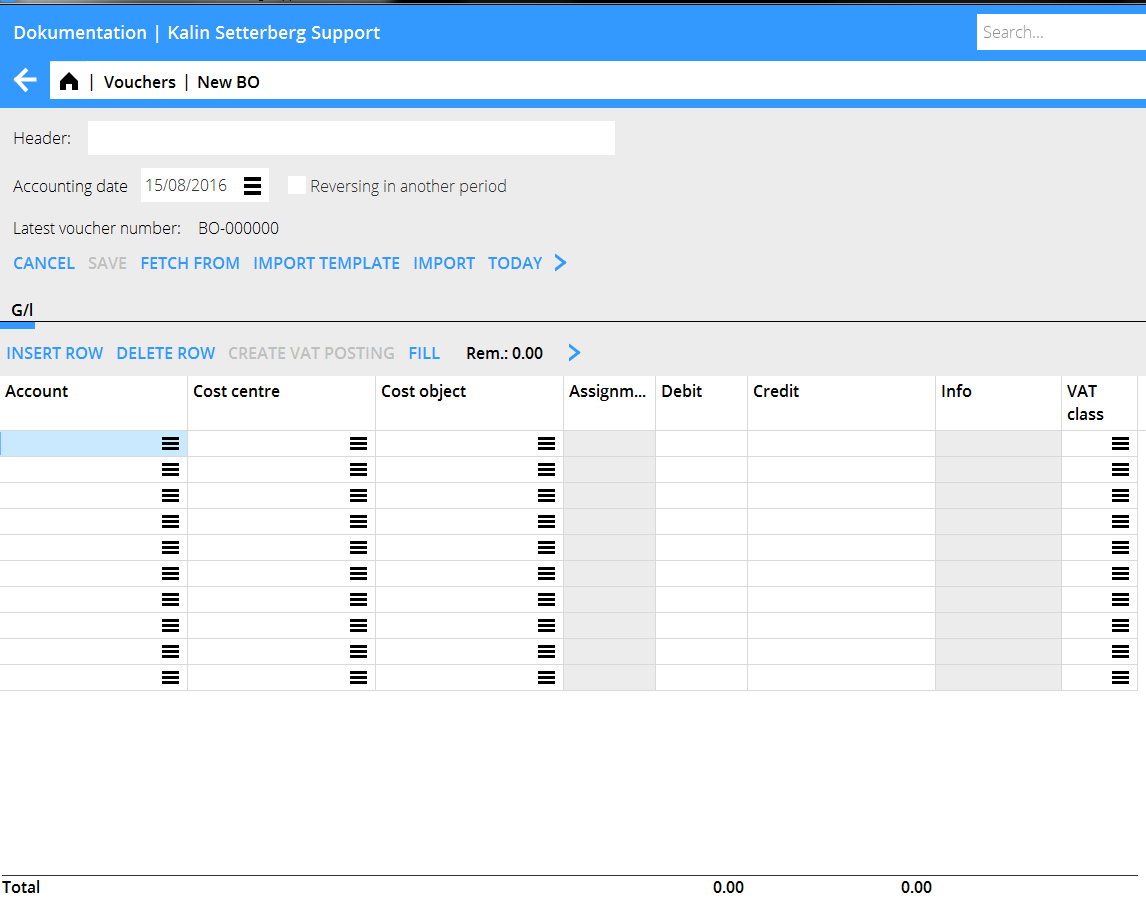
Verifikationer registreras i Ekonomi/Registrering verifikationer. Standardserien har prefixet BO, men fler verifikationsserier kan läggas upp i Template:System. Gemensamt för alla är att de ska bestå av två tecken, varav den första är B.
Välj serie och tryck på Ny. Registreringen börjas alltid med att ett bokföringsdatum anges.
En enkel verifikation registreras med två eller flera konton, samt belopp i debet och kredit. Andra funktioner är:
| Hämta från | Funktion för att kopiera tidigare verifikation. Verifikationen väljs från en lista. |
|---|---|
| Hämta mall | En verifikationsmall kan skapas i System/Basregister/Bok/Verifikationsmallar. Se beskrivning under Skapa verifikationsmall. |
| Importera | Importerar sie-filer. |
| Vändning i annan period | Skapar en vänd verifikation med ett annat bokföringsdatum. |
| Bokföringsdatum + Idag | Fältet Bokföringsdatum måste alltid fyllas i innan resterande uppgifter kan registreras. Klicka på Idag för att ange dagens datum, övriga datum fylls i manuellt. Det angivna datumet kommer som förslag i nästa verifikation. |
| Rubrik | Denna rubrik syns på startsidan till verifikationsregistreringen och är sökbar. |
| Verifikationsnummer | Verifikationsnummer hämtas automatiskt från Basregister/BOK/Verifikationsserier. |
| Konto | Fyll i konto. |
| Kostnadsställe/-bärare | Fyll i kostnadsställe respektive kostnadsbärare om kontot kräver/tillåter detta. |
| Debet/Kredit | Ange belopp. |
| Dimensioner | Om dimensioner används visas de som separata kolumner. Läggs upp i Basregister/Bok/Parametrar i fliken Dimensioner. Manuella dimensioner redigeras i Basregister/Bok/Dimensioner. |
| Text | Ange eventuell text (25 tecken). Visas inne i huvudboken och kontospecifikationen. |
| Summering | Längst ned summeras debet- respektive kreditkolumnerna. Det går inte att spara verifikationen om den inte balanserar. |
| Skapa momskontering | Om Marathons ingående momshantering används kan en automatisk kontering av moms skapas med hjälp av knappen Skapa momskontering. Avgörs av momsklasserna i Basregister/Bok/Momsklasser. Systemet beräknar den ingående momsen efter hur mycket som är uppmärkt med de olika momsklasserna och hämtar momskontot från momsklassen. |
| Fyll ut | Fyller automatiskt i resterande belopp för att verifikationen ska balansera, förutsatt att ett konto har angivits. |
| Rest | Visar hur stort belopp som finns kvar att balansera. |
Skapa verifikationsmall
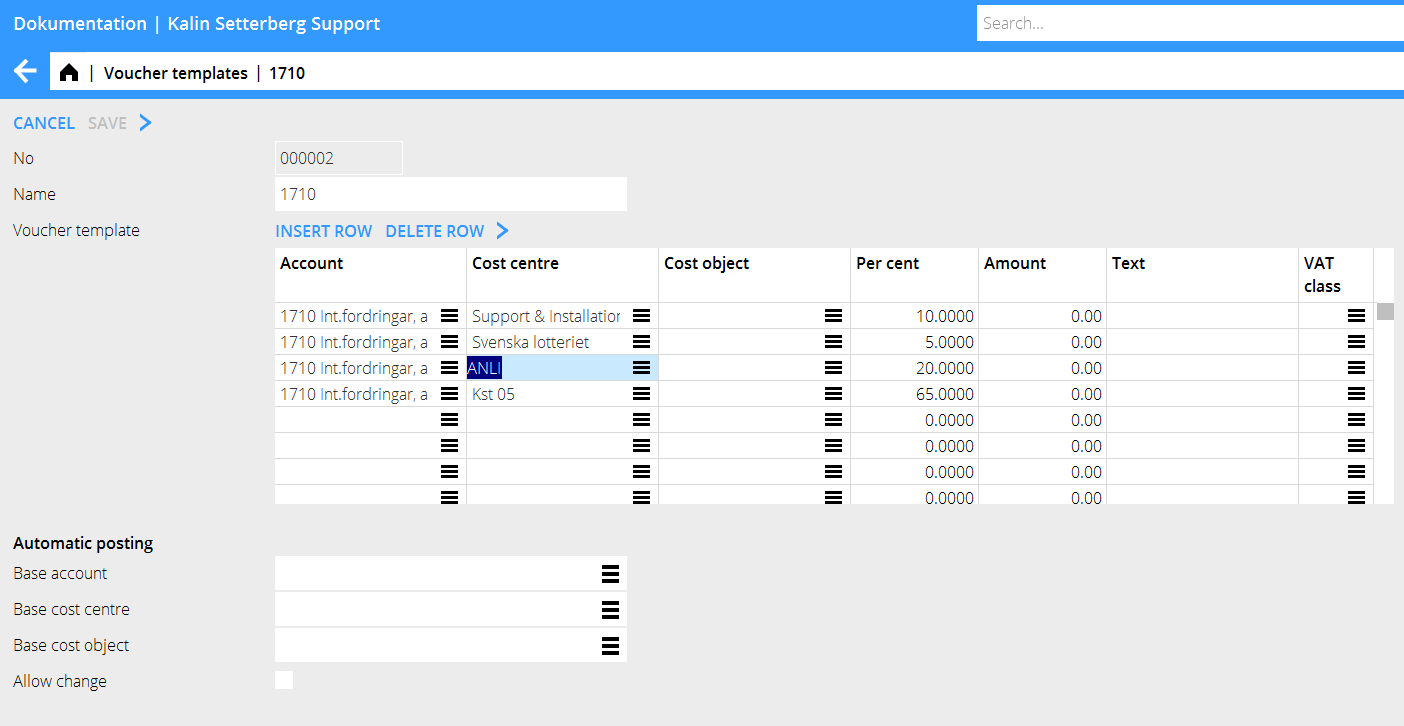
Create voucher templates in Base registers/GL/Voucher templates. Press New and give the template a name. Enter amount and possible cost centre or/and cost object, if the account allows it. Enter either a part of the amount in per cent or the monetary amount in your currency. If you use per cents the system asks for the total amount and calculates the part with the percentage you have entered.
Enter voucher with assignment to another subsystem
If the entered account is assigned to another subsystem, a yellow tab will appear, with an abbreviation of the subsystem name. In the tab you shall enter contents that concerns the subsystem. Below a description of the most common integrations.
Client payments
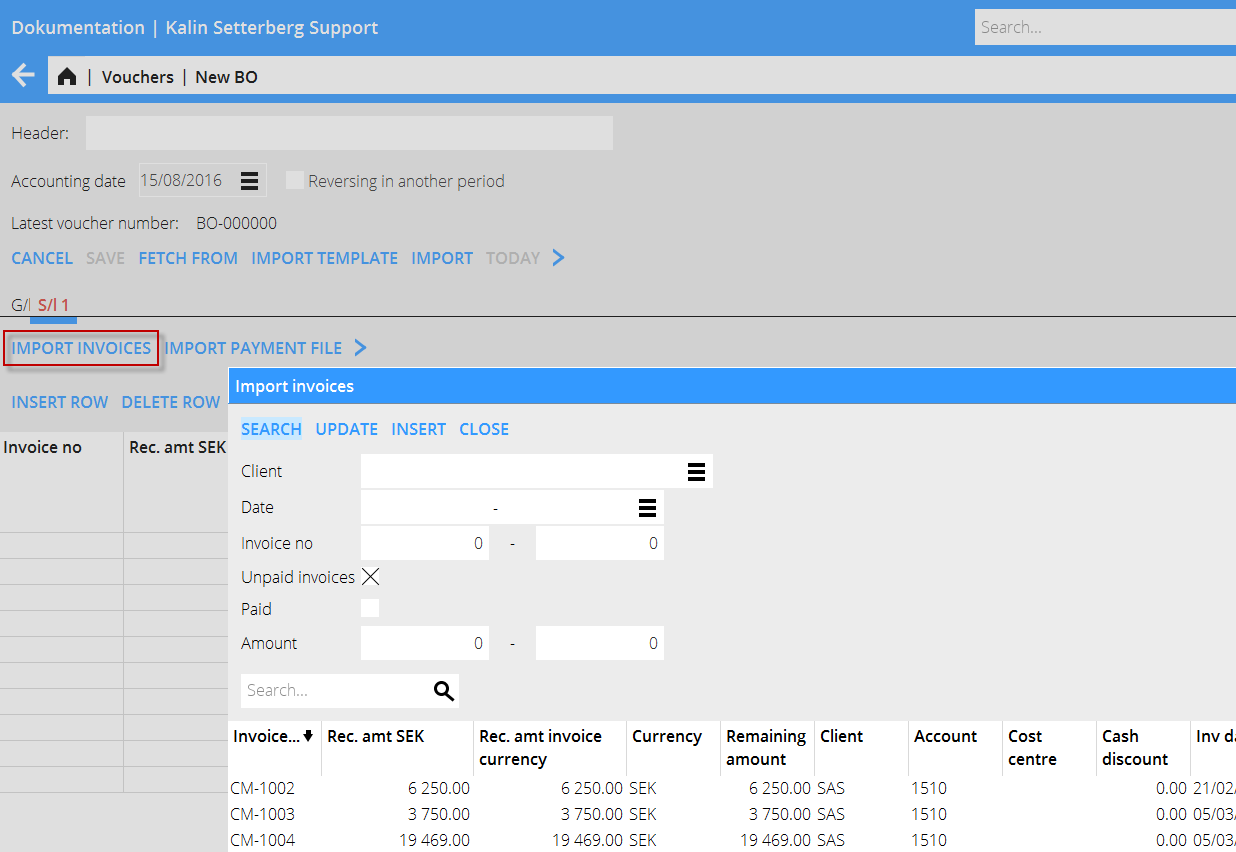
The account receivable is assigned to the sales ledger, which means that when you enter the account, the system creates a tab called SL followed by the tab number. Register the payments in the tab. Enter invoice number or search invoices with the function Import Invoices. You can search with client, date, invoice number, etc.
The whole invoice amount is fetched into the table. If only a part of the invoice has been paid, write the received amount over the amount in the Rec. amt (your currency) – field. If the payment is in a foreign currency this field is empty and you must write in the amount that the bank has received. The currency discrepancy that might occur is automatically posted on an account defined for that (Base registers/SL/Parameters: Acc for currency rate profits and Acc for currency rate losses).
If a foreign invoice is partly paid, write the received amount both in Rec. amt (your currency) and Rec. amt invoice currency. The remaining difference will be a residue and a possible rate discrepancy (if received amount in your currency divided with the rate doesn't correspond with the amount in the field Rec. amt Invoice, the difference will be a rate discrepancy).
After registration of the invoices, go back to the GL tab and enter an account for the payment (e.g. bank account). If you press the function Fill here, the remaining will be posted on the account.
Supplier payments
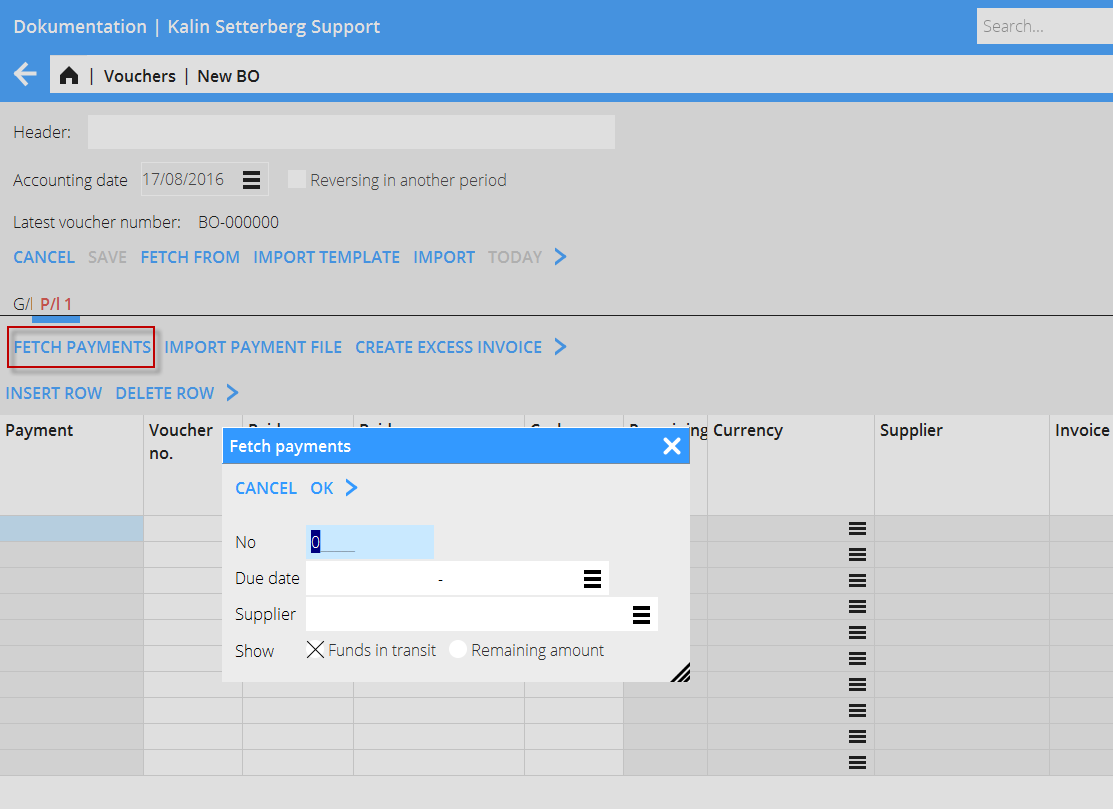
The account payable is assigned to the purchase ledger, which means that when you enter the account, the system creates a tab called PL followed by the tab number. Register the payments in the tab. Enter invoice number of the paid invoice or search a created payment with the function Fetch payments. Here you can search on payment number, date or supplier. You can also find invoices with residues. Ther e is also a function for importing a payment file.
The whole invoice amount is fetched into the table. If only a part of the invoice has been paid, write the paid amount over the amount in the Rec. amt (your currency) – field. If the payment is in a foreign currency this field is empty and you must write in the amount that the bank has sent. The currency discrepancy that might occur is automatically posted on an account defined for that (Base registers/SL/Parameters: Acc for currency rate profits and Acc for currency rate losses).
If a foreign invoice is partly paid, write the paid amount both in Rec. amt (your currency) and Rec. amt invoice currency. The remaining difference will be a residue and a possible rate discrepancy (if received amount in your currency divided with the rate doesn't correspond with the amount in the field Rec. amt Invoice, the difference will be a rate discrepancy).
After registration of the invoices, go back to the GL tab and enter an account for the payment (e.g. bank account). If you press the function Fill here, the remaining will be posted on the account.
Create excess invoice
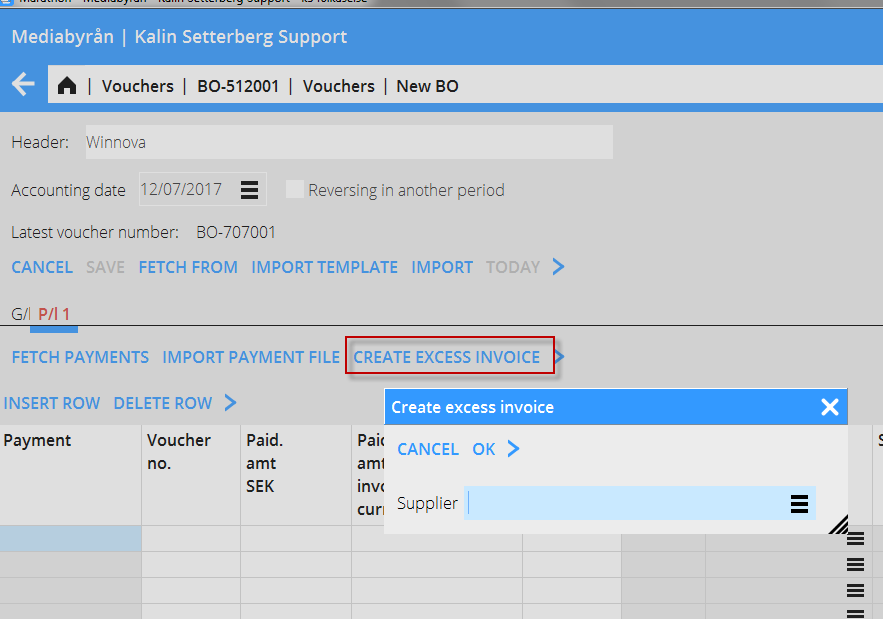
With this function, you can register a pre-paid amount in the purchase ledger directly, even when the supplier's invoice hasn't arrived yet. The payment gets an LA -number.
Enter supplier and an amount.
Enter project purchase
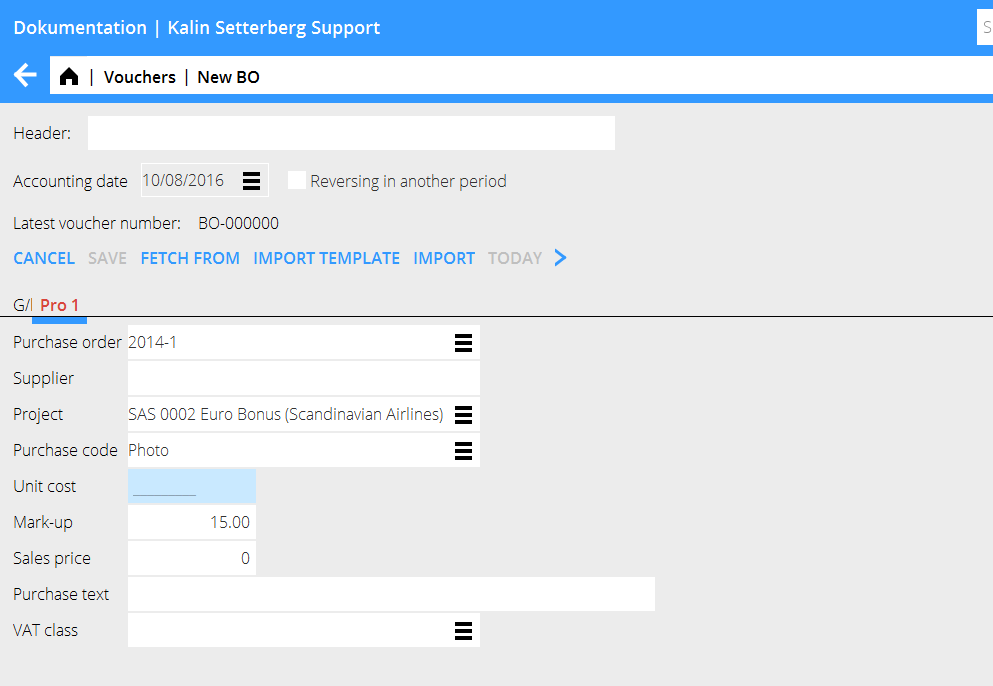
The account for project purchases is assigned to the project management, which means that when you enter the account, the system creates a tab called PRO followed by the tab number. Register purchases that shall be charged a project in the tab. Enter project, purchase code and a purchase price. The sales price is automatically calculated with the mark-up percentage that has been defined on the purchase code. In many cases the mark -up can be changed (there is a parameter setting for that option) if you want to change it. Write optional purchase text. If you have been using purchase orders at the project purchase, you can enter it here and the system will fetch all contents from it. Make the contrary posting in the tab GL.
Enter periodical allocations
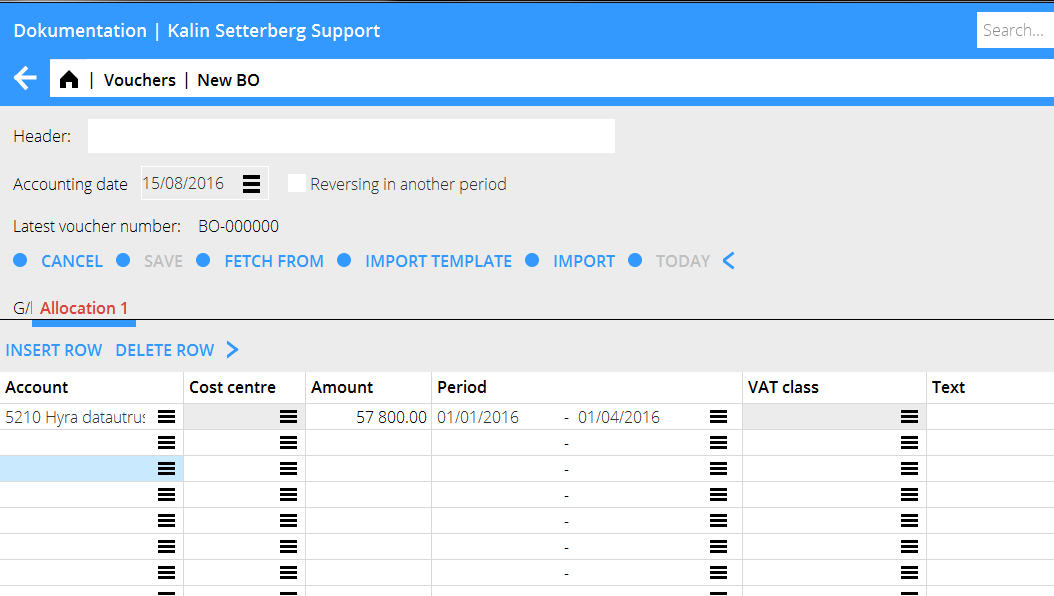
The account for accruals (periodical allocations) is assigned to periodical allocations, which means that when you enter the account, the system creates a tab called Allocations followed by the tab number. Enter the costs that shall be allocated over a certain period. Enter cost account, amount and the period for the allocation. You can enter the date in two different ways: MMYY– MMYY or DDMMYY. In the first case the amount is allocated evenly on all months, in the latter depending on how many days each month has. Make the contrary posting in the GL tab
Enter assets (inventories)
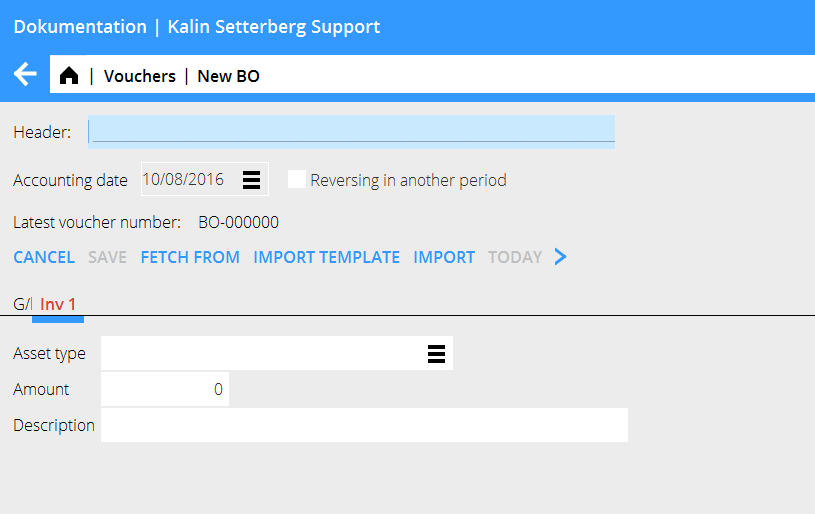
The account for inventories is assigned to the inventory ledger, which means that when you enter the account, the system creates a tab called INV. If the acquisition account only is connected to one asset type, it will show automatically. If not, select asset type. Write amount and a possible description. Make the contrary posting in the GL tab.
Correct a voucher
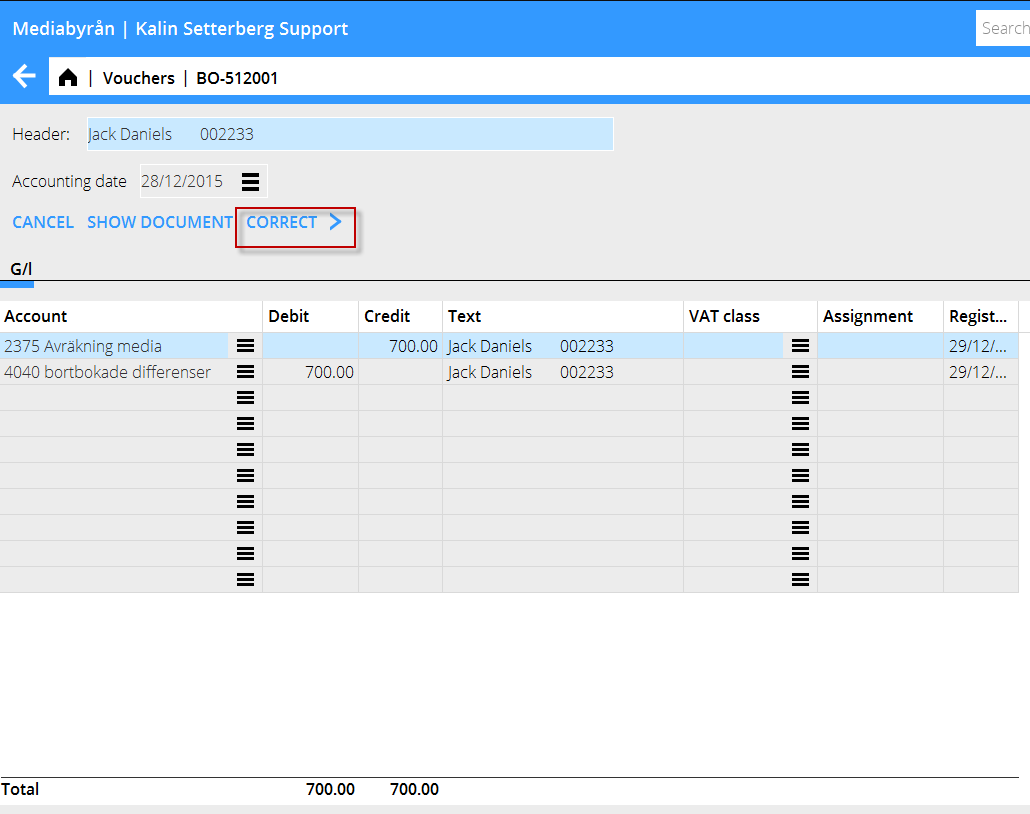
Select the voucher that you want to correct and press Open. Then press Correct.
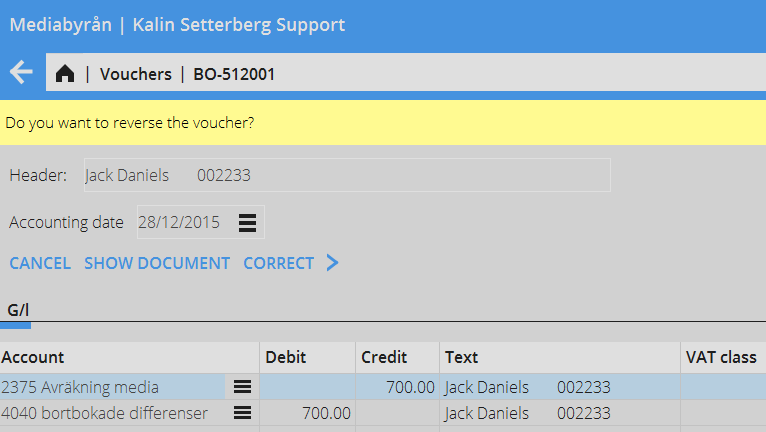
Marathon asks you if you want to reverse the voucher.
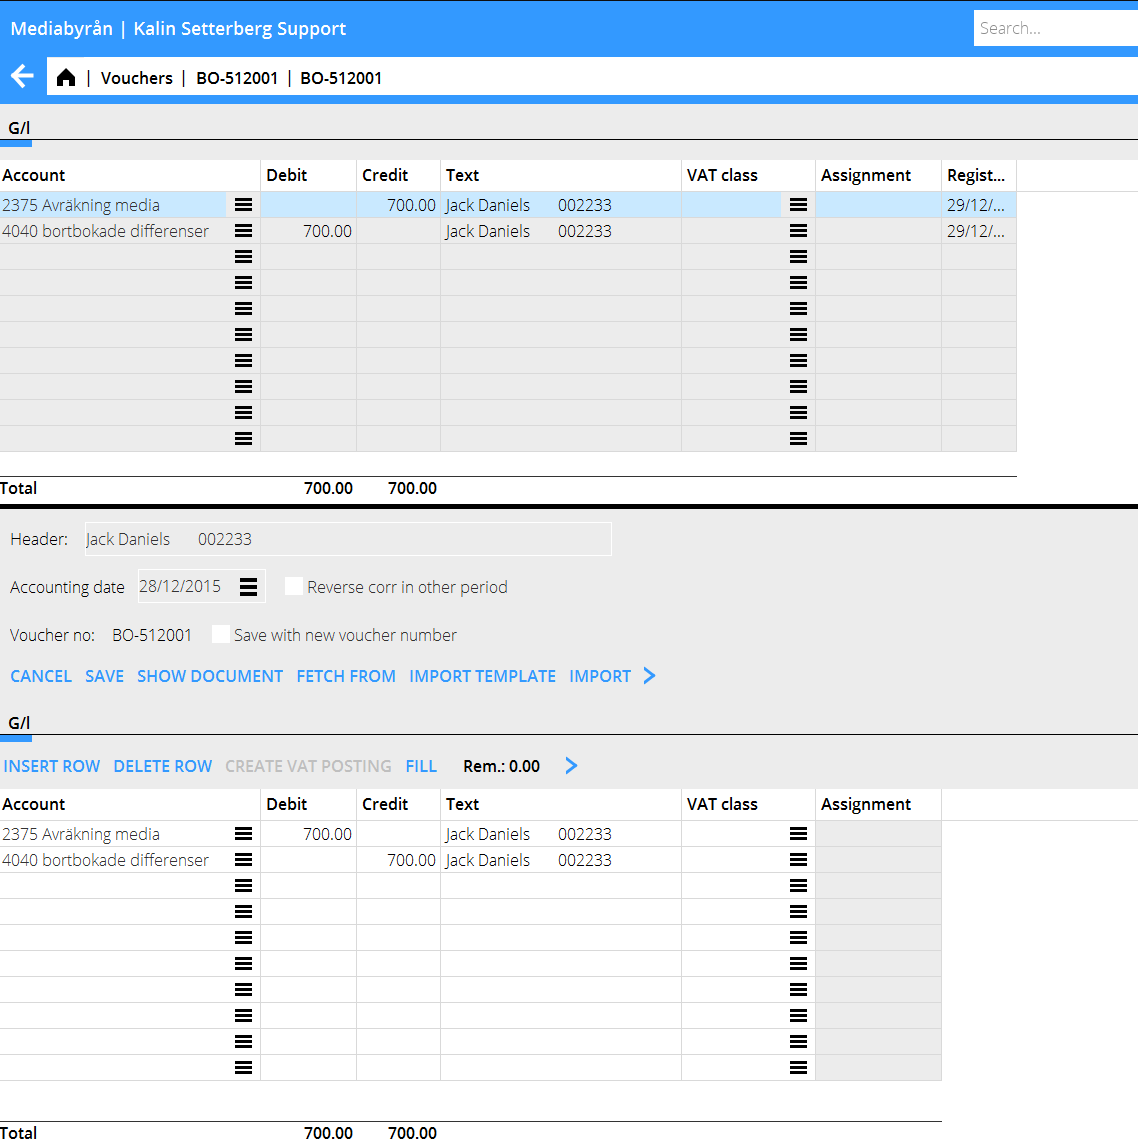
Click on Yes if you want to reverse the whole voucher. If you want to reverse the correction in another period, check the box Reverse corr in another period and select Reversing date at the top of the screeen.
The reversing can also be saved with the same date, but with a new voucher number. Use “Save withnew voucher number”.
Select No if the voucher shall be corrected and not reversed. Make the correction in the lower table. Also here you can reverse the correction in another period and/or save with the same date but a new voucher number.
